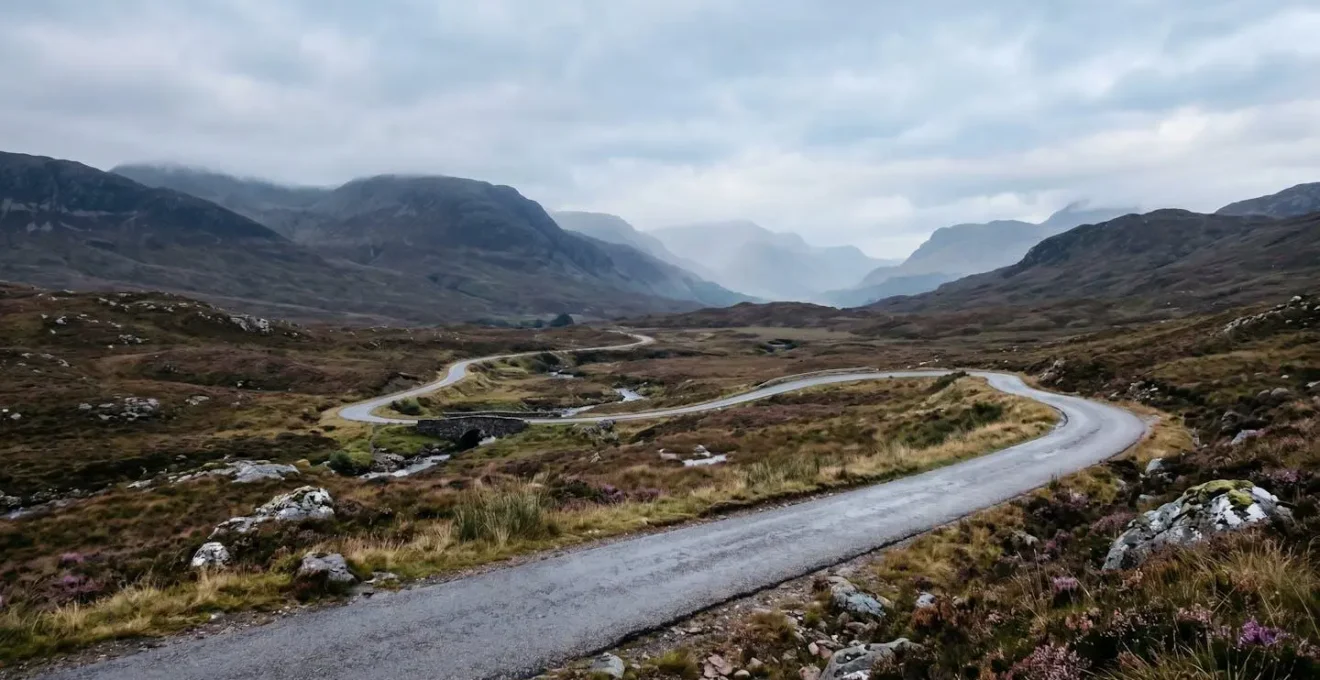
The UK’s most compelling road photographs aren’t taken on famous routes, but are created by understanding how light and landscape interact.
- The best light is often found on humid coastal B-roads, not motorway viewpoints.
- Dramatic scenery is a direct result of geology; limestone gorges and Highland passes offer unique photographic qualities.
Recommendation: Stop chasing destinations and start planning your journey around light, weather, and topography to find unique shots on any road.
For many photographers, the quest for the perfect British road trip photo ends in a familiar sense of disappointment. You arrive at a famous viewpoint in the Scottish Highlands or the Lake District, satnav triumphant, only to find a line of cars and a dozen other tripods all aimed at the exact same vista. The shot is predictable, the magic diluted. We’ve been conditioned to think that epic photos come from epic, well-known locations, chasing the tail lights of countless others along the NC500 or through Snake Pass.
This approach overlooks a fundamental truth known to seasoned landscape photographers: the quality of a road photograph has less to do with the road’s fame and more to do with the photographer’s understanding of light, timing, and landscape. The common advice—”shoot at golden hour,” “find a leading line”—is the beginning of the story, not the end. It’s the equivalent of knowing the ingredients for a cake but not the method. The real artistry lies in moving beyond the obvious pull-offs and learning to read the landscape like a map of light and shadow.
But what if the key wasn’t about finding a secret road, but about possessing the secret knowledge to make any road photogenic? This guide moves beyond the tourist trail. We will deconstruct the science behind a great road shot, from the atmospheric physics of coastal light to the geological drama of a limestone gorge. Forget simply listing destinations; we’re providing a system. A professional’s framework for planning, scouting, and executing images that capture the hidden soul of the British landscape, turning overlooked B-roads and single-track lanes into your own private masterpieces.
This article will guide you through the professional’s workflow, from understanding the science of light to mastering the art of planning. Discover a new system for seeing and capturing the UK’s most dynamic road scenery.
Summary: A Photographer’s System for Finding Britain’s Hidden Vistas
- Why Coastal B-Roads Deliver Better Sunrise Shots Than Motorway Viewpoints
- How to Plan Your Photography Route Using Seasonal Foliage Patterns in 5 Steps
- Single-Track Highland Roads vs Lake District Passes: Which Delivers More Dramatic Vistas?
- The Lay-By Mistake That Ruins 70% of A-Road Landscape Shots
- When to Shoot Moorland Roads: The 3 Weather Windows Professionals Use
- How to Time Your Arrival for Golden-Hour Light at Panoramic Overlooks Using 3 Apps
- Why Limestone Gorges Create the UK’s Most Dramatic Road Scenery
- How to Plan Scenic Journeys That Deliver 90% More Memorable Moments
Why Coastal B-Roads Deliver Better Sunrise Shots Than Motorway Viewpoints
The motorway viewpoint, often perched high and dry, seems like the logical choice for a sweeping sunrise. Yet, professional photographers frequently favour the humble coastal B-road. The reason is not the view, but the quality of the light itself. The secret lies in atmospheric physics. Humid coastal air is filled with larger water vapour droplets than the dry air of inland areas. As the low-angle sun rises, this moisture-rich air acts as a giant natural diffuser.
This diffusion process is a photographer’s best friend. It scatters and refracts light, which not only softens shadows but also dramatically boosts colour saturation. The result is the rich, painterly palette of deep oranges, pinks, and purples that is far less common in drier, clearer inland conditions. Put simply, the sea spray and humidity create a natural softbox that enhances the sunrise, a phenomenon that scientific research on atmospheric optical effects confirms results in more saturated colours.
The image below captures this effect. Notice how the light isn’t harsh but glows, diffused by the sea mist, creating gentle gradients of colour across the sky and reflecting on the wet tarmac. This is the coastal light advantage.
Furthermore, coastal B-roads often hug the topography, offering dynamic curves that lead the eye directly towards the rising sun over the water. Motorway viewpoints, by contrast, are often set back, creating a flatter, more detached perspective. For a sunrise shot with unparalleled colour and atmosphere, the choice is clear: find a quiet road where you can almost taste the salt in the air.
How to Plan Your Photography Route Using Seasonal Foliage Patterns in 5 Steps
Capturing the perfect autumnal road trip shot requires more than just showing up in October. The vibrant flush of autumn colour is a fleeting, moving target, influenced by species, elevation, and local weather. Relying on calendar months is a recipe for disappointment. Professionals instead plan their routes using phenological data—the study of nature’s calendar—to predict and track the moment of peak foliage with precision.
Citizen science projects, like the UK’s Nature’s Calendar, provide invaluable data, tracking when different tree species begin to turn across the country. This reveals a crucial pattern: trees at higher elevations and further north change colour first, with the wave of colour flowing south and downhill over several weeks. This allows a photographer to ‘chase the peak’ by planning a route that intercepts this wave.
For a truly curated colour palette, research the dominant species along your intended route. A drive through a forest of Beech trees will yield a spectacular display of copper and gold, while Oak-dominated woodlands offer deep russet tones much later in the season. The key is to move from reactive photography to proactive planning, using data to inform your creative choices. This methodology applies not just to autumn but also to the vibrant lime-green bud bursts of spring or the stark, skeletal beauty of trees in late winter, offering unique palettes for minimalist compositions.
- Step 1: Track Progression: Use resources like Forestry England’s online fall foliage maps to see real-time colour changes across different regions and elevation zones.
- Step 2: Understand the Flow: Remember the core principle—colour starts high and north, moving low and south. Plan your route to follow this natural progression.
- Step 3: Target Species: Decide on your desired colour palette. Research which trees (e.g., Beech for copper, Larch for gold) dominate your chosen area to time your visit for their specific peak.
- Step 4: Think Beyond Autumn: Apply the same principles to other seasons. Plan for the fresh greens of a spring bud burst or the minimalist beauty of bare winter branches.
- Step 5: Cross-Reference with Weather: Once you have a predicted peak date, cross-reference it with local weather forecasts. The ultimate shot happens when peak colour coincides with great light.
Single-Track Highland Roads vs Lake District Passes: Which Delivers More Dramatic Vistas?
The debate between the Scottish Highlands and the Lake District for scenic supremacy is a classic. Both offer breathtaking drives, but they deliver fundamentally different types of photographic drama. The choice between them depends entirely on the narrative you want your image to convey. The Lake District, with its stone-walled passes like Hardknott and Wrynose, offers a drama of intimacy and claustrophobia. The roads are tight, hemmed in by ancient walls, and the landscape feels close, textured, and almost human-scaled.
The Highlands, in contrast, deliver a drama of epic scale and isolation. The single-track roads, punctuated by passing places, are a narrative in themselves, speaking of sparse communities and resilience against a vast, often overwhelming landscape. A prime example is Bealach na Bà, Britain’s steepest road. As it climbs from sea level to over 600 metres, it offers vistas that are simply impossible in the more compact Lake District.
The view from the top of Bealach na Bà allows the eye to travel from the intricately carved cliffs and heather-strewn slopes at your feet, across the serpentine road, and out to the vast, calming expanse of the Atlantic. Photographs taken here inherently emphasise the insignificance of the human element within this immense natural stage. The single-track road becomes a fragile thread in a monumental tapestry. This is a story of sublime, humbling scale that the enclosed, albeit beautiful, valleys of the Lake District cannot tell.
Therefore, for photographers seeking to capture a sense of awe, wildness, and the epic relationship between humanity and nature, the single-track Highland roads are unparalleled. For those seeking a more intimate, pastoral, and historically textured landscape, the Lake District passes provide a richer canvas. The question is not which is better, but which story you wish to tell.
The Lay-By Mistake That Ruins 70% of A-Road Landscape Shots
The designated lay-by or viewpoint is the single greatest enemy of original road photography. It’s where creativity goes to die. While it provides a safe place to park, it is almost never the best place to shoot. The lay-by shot is ruined by three things: it’s the most obvious and therefore clichéd perspective, the foreground is inevitably a mess of tarmac and litter, and it’s often poorly positioned in relation to the road’s most interesting curves.
The fundamental mistake is treating the lay-by as the destination. A professional photographer treats it merely as a base camp. The real work, and the real shot, begins by walking. As noted by photography guides, the best composition often requires effort. As Chasing Light Tours state in their composition guide:
The viewpoint everyone shoots from is usually obvious. The viewpoint that gives you all three layers working together often takes time to find.
– Chasing Light Tours, Landscape Photography Composition Guide
Walking just 50-100 metres before or after the pull-off can reveal a completely different perspective. You can find clean, natural foreground elements like heather or a dry-stone wall to frame the scene. More importantly, it allows you to change your relationship with the road. Instead of shooting from beside it, you can move further away and use a telephoto lens (70-200mm) to employ perspective compression.
This technique, shown above, makes distant elements appear closer, stacking the road’s S-curves on top of each other to create a dramatic, serpentine effect that’s impossible to capture with a wide-angle lens from the lay-by. You transform a gentle curve into a dynamic, graphic element. This is the core of moving beyond the snapshot and into intentional landscape photography.
Action Plan: Working Beyond the Lay-By
- Park, Don’t Shoot: Use the lay-by only for safe parking. Your camera gear should not even come out of the bag here.
- Scout on Foot: Walk 50-100 metres in either direction. Look for where the road’s curve is most elegant or the foreground is cleanest and most compelling.
- Find Your Foreground: Actively seek natural elements—rock clusters, wildflowers, a leading fence line—to anchor your shot and create a sense of depth that hides the road shoulder.
- Compress the Scene: Step well back from the road and switch to a telephoto lens. Experiment with zooming to stack the road’s curves and compress them against the background.
- Edge Patrol: Before you press the shutter, meticulously scan the edges of your frame. Ensure no distracting lay-by infrastructure (bins, signs, stray tarmac) has crept into your shot.
When to Shoot Moorland Roads: The 3 Weather Windows Professionals Use
Clear blue skies are a landscape photographer’s worst enemy, especially on the wide, open expanses of British moorlands. Featureless skies create flat, boring light and a lack of drama. Professionals know that the most compelling moorland images are born from “bad” weather. Instead of waiting for perfect conditions, they target specific, transient weather windows that bring character, mood, and extraordinary light to the scene.
These windows are often fleeting, lasting only a few minutes, but they offer photographic potential that a sunny day can never match. It’s about embracing the atmospheric chaos of the British climate and using it as a creative tool. As photographer Jennifer Carr notes about coastal light, which shares properties with moorland weather, the best moments are often tied to storms: “Some of the best moments occur after the sun rises—stay for golden hour.” The principle is the same: the drama is in the transition.
There are three key weather windows that professionals actively seek out for shooting moorland roads:
- Window 1 (The Post-Storm Clearance): The 30-minute period immediately after a heavy rain shower passes is pure gold. The air is scrubbed clean of haze, providing incredible clarity. The tarmac is dark, wet, and reflective, creating strong leading lines and mirroring the colour of the sky. Most importantly, this is when shafts of “God rays” often break through dramatic, dark clouds, spot-lighting parts of the landscape.
- Window 2 (The High-Contrast Fog): Low-lying morning fog or mist should not be seen as an obstacle, but as a giant softbox. It simplifies a cluttered scene, hiding distracting backgrounds and isolating key elements. A road snaking out of a thick fog bank is a powerful, minimalist composition that evokes a sense of mystery and discovery.
- Window 3 (The Wind-Swept Moment): Moorlands are defined by wind. Instead of fighting it, use it. By placing your camera on a tripod and using a slightly slower shutter speed (e.g., 1/15s), you can capture the motion blur of the grasses and scudding clouds, contrasting this movement with the static, solid line of the road for an incredibly dynamic and energetic image.
How to Time Your Arrival for Golden-Hour Light at Panoramic Overlooks Using 3 Apps
The “golden hour” is a deceptively simple concept. It’s not enough to know that it happens just after sunrise and before sunset. For a panoramic overlook, where the light’s interaction with the landscape is everything, precision timing is crucial. Arriving five minutes late can mean the difference between a magical, glowing landscape and a flat, shadowed one. Professionals leave nothing to chance, using a three-app strategy to ensure they are in position and ready to shoot at the precise moment of optimal light.
This isn’t just about knowing the sunset time. It’s a three-dimensional problem involving the sun’s angle, your travel time on unpredictable rural roads, and the topography of the landscape itself. A nearby mountain ridge you didn’t account for could block the sun and end your golden hour 20 minutes earlier than you expected. Each app in this strategy solves one piece of this complex puzzle, allowing you to work backwards from the perfect shot to determine your exact departure time.
The final, non-negotiable part of this equation is building in a buffer. Technology gets you the data, but photography requires on-the-ground setup. As the table below outlines, adding a 30-minute on-site buffer before the calculated “light-on-subject” time is essential. This gives you time for the unforeseen—finding a safe parking spot, scouting the final composition, setting up your tripod, and fine-tuning your settings without rushing as the perfect light fades.
| App Category | Primary Function | Critical Use Case | Pro Technique |
|---|---|---|---|
| App 1: Light Tracker (PhotoPills) | Calculate golden-hour window and sun position | Determine exact timing when sun angle is optimal | Use 3D augmented reality to preview sun path and identify precise light-hitting moment for your chosen road section |
| App 2: Traffic Navigation (Google Maps) | Realistic travel time calculation | Account for rural road traffic patterns | Input ‘arrive by’ time into Google Maps to get accurate departure time based on typical traffic for that specific B-road or single-track route |
| App 3: 3D Topography (FATMAP) | Shadow-casting prediction from terrain | Identify when light will actually reach your subject | Check for nearby ridges or mountains that cast shadows—sun may be at golden-hour angle but road could be in deep shadow for 20+ minutes longer |
Why Limestone Gorges Create the UK’s Most Dramatic Road Scenery
While granite peaks offer raw power, it is the geology of limestone that creates some of the UK’s most photogenic and dramatically lit road scenery. Locations like Cheddar Gorge are not just impressive for their scale but for the unique quality of light they produce. The drama comes from a combination of sheer verticality and the reflective properties of the rock itself.
A road winding through a deep limestone gorge is fundamentally different from a road in an open valley. The towering cliffs create a sense of enclosure and grandeur, naturally framing the road and sky. This verticality provides powerful compositional lines that draw the viewer into the scene. Cheddar Gorge, which receives over 90,000 monthly searches and is England’s largest gorge, is a testament to the public’s fascination with this type of landscape. Its three-mile length and 400-foot-deep cliffs create a journey that feels both epic and intimate.
However, the true secret to the photographic magic of a limestone gorge is the rock’s colour and texture. This is a concept that expert sources on light have long understood. As explained in research on atmospheric optics:
The pale, porous surface of limestone acts as a giant, neutral-coloured bounce card, reflecting soft, diffused light back onto the road, creating a natural studio lighting effect impossible to achieve in valleys of dark granite or slate.
– Springer Nature, Atmospheric Optical Effects in the Coastal Zone
This “bounce card” effect is transformative. On an overcast day, the cliffs gather and reflect ambient light, illuminating the shadows and preventing the scene from becoming dull or flat. In direct sun, they bounce soft, warm light onto the road and into the shaded areas, creating a beautifully balanced exposure. The road is no longer just a dark strip of tarmac but is lit as if in a natural studio. It’s this unique interaction between geology and light that makes limestone gorges a premier destination for road photography.
Key Takeaways
- Light Over Location: The quality of your photo is determined by your understanding of light—coastal humidity, limestone reflection, and weather—not the fame of the road.
- Planning Over Luck: The best shots are never accidental. Use data, from foliage trackers to 3D topography apps, to plan your arrival for the moment of peak potential.
- The Shot Is Not in the Lay-By: The most crucial step to unique photos is to treat viewpoints as parking spots. The real composition is found by walking and using your lens to deconstruct the scene.
How to Plan Scenic Journeys That Deliver 90% More Memorable Moments
The most memorable road trips are rarely the ones that follow a rigid A-to-B itinerary. For a photographer, a successful journey is measured not in miles covered, but in moments captured. The problem with traditional route planning is that it prioritises efficiency over discovery. It guides you along the fastest, most logical path, which is almost never the most scenic or inspiring. To create journeys that are rich with photographic opportunities, you need to adopt a more flexible, exploratory mindset.
This means abandoning the idea of a linear route and instead embracing the “Anchor & Explore” method. Your journey is planned around 2-3 key ‘photographic anchors’—a specific waterfall, a unique bridge, a promising moorland pass—that you know have potential. These are your non-negotiable destinations. The magic, however, happens in the space between them. At each anchor, you deliberately schedule a ‘window of exploration’, giving yourself 90 minutes to an hour to explore unmarked side roads, farm tracks, and dead ends within a 5-mile radius. This is where the true hidden gems are found.
This approach requires a significant shift in how you manage time. As the experts at Uncover Britain advise, you must build in buffers for serendipity. They astutely observe:
Plan extra time for photo stops—the most memorable moments often happen between the headline destinations.
– Uncover Britain, Top 10 Scenic Drives in the UK
By making improvisation a scheduled part of your plan, you give yourself permission to follow your curiosity. You transform the journey from a checklist of locations into a creative process of discovery, dramatically increasing the chances of returning home with unique and powerful images.
Your Checklist: The Anchor & Explore Method
- Define Your Anchors: Plan your trip around 2-3 key ‘photographic anchors’ (e.g., a specific waterfall, bridge, or pass) instead of a rigid A-to-B route.
- Schedule Exploration Windows: At each anchor, block out a 90-minute ‘exploration window’ to deliberately investigate unmarked side roads and tracks within a 5-mile radius.
- Overlay Historical Maps: Use online tools like the National Library of Scotland’s map viewer to overlay modern routes with old Ordnance Survey maps, revealing forgotten ‘drove roads’ or scenic old military roads that run parallel to today’s main arteries.
- Plan Sensory Checkpoints: Add non-visual stops to your plan—a famous local bakery, a silent glen to record sound, a windy viewpoint to feel the elements. This deepens your connection to the place and leads to more evocative photos.
- Embrace the Buffer: Always add extra time to your schedule specifically for unplanned stops. The best shot of the day is often the one you weren’t looking for.
Start planning your next trip not as a line on a map, but as a cluster of possibilities. Pick your anchors, schedule your exploration time, and pack your curiosity. The most photogenic roads are waiting, not on a top-10 list, but just off the path you were planning to take.