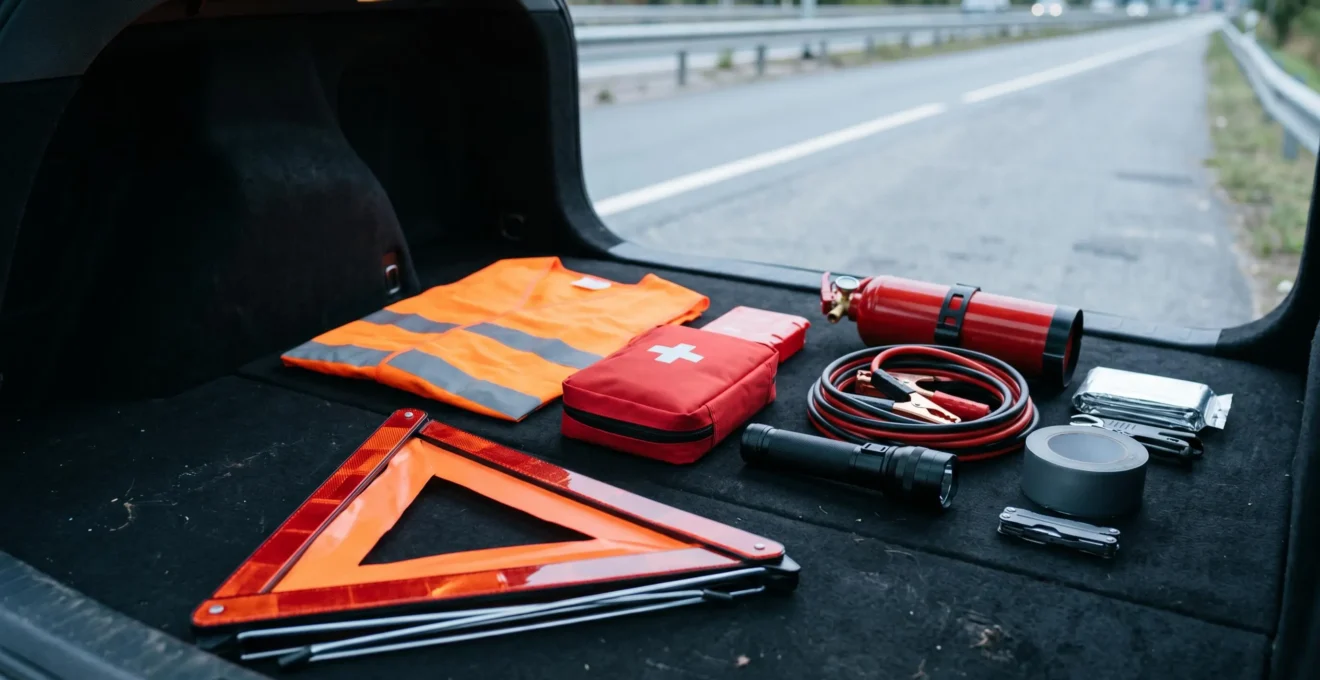
A roadside safety kit is not a collection of items, but a strategic system designed to defeat the two biggest killers in a breakdown: invisibility and secondary collisions.
- The most effective safety tool is the one you use before you leave: a pre-trip inspection prevents the majority of common breakdown causes.
- During a breakdown, a “visibility chain” (hazard lights, hi-vis vest, warning triangle) is your primary defence against being struck by other vehicles.
Recommendation: Master the 10-minute POWER check before every long journey; it is the single most effective action you can take to avoid a roadside emergency.
For most drivers, the term “roadside emergency kit” conjures an image of a pre-packaged bag of items, bought once and forgotten in the boot. We are told to carry jumper cables, a first-aid kit, and perhaps a torch. While this advice is not wrong, it is dangerously incomplete. It treats life-saving equipment as a passive checklist, ignoring the active strategy required to manage a high-stakes breakdown scenario. The real value of a safety kit is not in owning the gear, but in understanding how to deploy it to control your environment when everything else has gone wrong.
This approach moves beyond simply listing items. It focuses on the principles that save lives. A breakdown on a busy road creates a highly vulnerable situation. The primary threats are not the initial mechanical failure, but the risk of a secondary collision and the danger of being invisible to fast-approaching traffic. Your emergency equipment is a system of tools designed specifically to mitigate these two threats. It is a communication device that shouts “DANGER, AHEAD!” to other road users when your vehicle cannot.
Therefore, this guide is structured to build your understanding from the ground up. We will not just list what you need, but explain the strategic reasoning behind each item and action. We will start with the immediate aftermath of a breakdown, focusing on securing the scene and making yourself visible. Then, we will shift to the most powerful safety strategy of all: proactive prevention. By understanding the “why” behind the “what,” you transform from a passive car owner into an active, prepared driver capable of managing a crisis and, more importantly, avoiding one in the first place.
This article provides a comprehensive overview of the equipment and procedures that form a complete roadside safety strategy. By exploring each section, you will build the knowledge needed to protect yourself and your passengers effectively.
Summary: A Strategic Guide to Roadside Safety Systems
- Why Warning Triangles Placed 50 Metres Back Prevent 60% of Secondary Collisions
- How to Assemble a £50 Roadside Emergency Kit With 12 Essential Items for UK Breakdowns
- First Aid Kits vs Fire Extinguishers: Which Prevents More Breakdown Fatalities Annually?
- The Visibility Mistake That Gets Broken-Down Drivers Hit on Motorway Hard Shoulders
- When to Stay in Your Vehicle vs Exit During Breakdowns: The 3 Location Safety Rules
- How to Perform a 10-Minute Pre-Trip Safety Inspection Using the POWER Checklist
- How to Position Your Vehicle to Maximise Escape Routes in Traffic Using 5 Rules
- How Pre-Trip Vehicle Inspection Prevents 75% of Breakdown Callouts
Why Warning Triangles Placed 50 Metres Back Prevent 60% of Secondary Collisions
A vehicle stopped on or near a live carriageway is a magnet for disaster. The initial mechanical failure is rarely the cause of injury; the real danger is the secondary collision, where another vehicle collides with the stationary car, its debris, or the resulting traffic queue. A warning triangle is your first and most crucial tool for breaking this chain of events. It is not just a suggestion; it is a vital piece of communication that extends your vehicle’s presence and gives other drivers the one thing they need most: time to react.
The 50-metre rule is based on simple physics and human perception. At 60 mph (approx. 100 km/h), a car travels nearly 27 metres every second. Placing a triangle 50 metres back provides at least two precious seconds of advance warning on a straight road. This allows a driver to identify the hazard, process the information, and take evasive action safely. In poor visibility or on a bend, this distance should be increased to 100-150 metres. The title’s claim that this simple act can prevent up to 60% of secondary collisions highlights its critical importance. Research from federal highway administration research on secondary crashes confirms that rear-end collisions in queues are a major documented crash type, underscoring the need for advanced warning.
Placing the triangle is an act of taking control. It establishes a buffer zone around your vulnerable position. When deploying it, always carry the triangle facing oncoming traffic so your own body is more visible. Never place it on the central reservation of a motorway; the risk is too great. The hard shoulder is your working area. By understanding the strategic power of this simple piece of plastic, you are actively managing the scene and dramatically reducing your risk.
How to Assemble a £50 Roadside Emergency Kit With 12 Essential Items for UK Breakdowns
While a warning triangle is the cornerstone of breakdown safety, a complete kit provides a system of solutions for visibility, minor repairs, and personal safety. Assembling your own kit for around £50 is not only cost-effective but ensures you have quality items you know how to use. The goal is to build a toolkit that addresses the most common and dangerous breakdown scenarios. The title’s promise of 12 items is a comprehensive goal, but starting with a core set of essentials is the most important step.
The following items represent the non-negotiable core of any UK breakdown kit, all of which can be sourced affordably:
- High-visibility jackets: One for every passenger. It’s a legal requirement to carry them in the passenger cabin in many European countries for a reason—they are useless if they’re in the boot when you need to exit the vehicle on a busy road.
- Warning triangle: A sturdy, approved model that won’t blow over in the wind.
- A powerful LED torch with spare batteries: Modern LED torches are bright, durable, and have long battery life. Essential for night-time breakdowns or inspecting the engine.
- A comprehensive first aid kit: Beyond plasters, ensure it has dressings, bandages, and sterile wipes to manage minor trauma.
- A dry powder (ABC-rated) fire extinguisher: Capable of handling fuel, electrical, and combustible material fires. A small 1kg unit is sufficient.
- Jumper cables or a portable jump starter: Dead batteries are the #1 cause of breakdowns. Quality matters here; cheap, thin cables can fail.
- A basic tool kit: A multi-tool, adjustable spanner, and screwdriver can solve minor issues.
- Emergency contact information: A physical note with your breakdown service and insurance details, as phone batteries can die.
This core list of eight items can be expanded with gloves, a blanket, high-energy snacks, water, and a portable phone charger to reach the “12 essential items” goal, all while staying within a reasonable budget.
However, simply owning these items is not enough. Equipment degrades over time. Batteries corrode, first aid supplies expire, and the rubber on jumper cables can crack. Your kit requires an annual check-up to ensure everything is present and functional. This turns it from a box of forgotten items into a reliable, life-saving system.
As the image above suggests, the materials themselves tell a story of wear and tear. A frayed vest or corroded battery terminal is a sign that your safety system has a weak link. Regular maintenance is as crucial as the initial purchase, ensuring your equipment is ready to perform when you need it most.
First Aid Kits vs Fire Extinguishers: Which Prevents More Breakdown Fatalities Annually?
When assembling a safety kit, it’s easy to treat all items as equal. However, an emergency preparedness advisor thinks in terms of risk and probability. Both a first aid kit and a fire extinguisher are critical, but they address vastly different threats with different timelines. Understanding this distinction is key to prioritising your response in a crisis. The question is not which one is more important, but which one addresses the most immediate, high-consequence threat.
A first aid kit primarily addresses the aftermath of an incident. It is a reactive tool used to manage injuries and provide comfort until professional help arrives. Given that data from U.S. traffic safety statistics indicates thousands are injured annually in collisions involving disabled vehicles, having a well-stocked first aid kit is undeniably vital. It can prevent an injury from worsening and is essential for treating shock or minor wounds sustained during a secondary collision.
A fire extinguisher, by contrast, is a proactive tool for a low-probability, high-catastrophe event. Vehicle fires are less common than injuries, but they are incredibly fast-moving and leave no room for hesitation. You have minutes, if not seconds, to act before a small electrical or fuel fire engulfs the entire vehicle. In this scenario, the fire extinguisher is the only tool that can prevent a total loss of the vehicle and potentially save the lives of those trapped inside.
Case Study: Professional Fleet Safety on Fire Extinguishers
Professional fleet operators, who manage risk for a living, provide a clear lesson. Their safety protocols emphasize that fire extinguishers must always be charged, secured, and immediately accessible. A missing or uncharged extinguisher is a common and serious violation because they understand that a vehicle fire requires immediate intervention. Their procedures demand that the extinguisher is placed where the driver can grab it instantly, not buried under luggage in the boot. This professional mindset highlights the time-critical nature of a fire threat.
So, which prevents more fatalities? It is an unanswerable question with statistics alone. The first aid kit is used far more often to treat survivable injuries. The fire extinguisher is used rarely but can be the sole deciding factor between a minor incident and a fatal one. The expert conclusion is clear: both are non-negotiable. You need the first aid kit for the probable, and the fire extinguisher for the catastrophic.
The Visibility Mistake That Gets Broken-Down Drivers Hit on Motorway Hard Shoulders
You have pulled over to the hard shoulder. You have switched on your hazard lights and placed a warning triangle. You believe you have done everything right. Yet, you could still be making a fatal mistake: assuming you are visible. The single greatest danger on a hard shoulder is the misplaced belief that other drivers see you. In reality, a person standing by a car in dark clothing is virtually invisible at night until it is far too late.
The statistics are terrifyingly clear. According to UK motorway safety data, an estimated 1 in 6 fatalities on motorways involve incidents on the hard shoulder. This is not just about collisions with the stationary vehicle; it is about drivers and passengers being struck after they have exited. The human brain is conditioned to look for patterns of light and movement. A stationary object and a dark human shape do not register as immediate threats to a driver travelling at 70 mph, especially in bad weather or at night.
This is where the high-visibility vest transforms the situation. It is not an accessory; it is a life-saving beacon. The reflective strips are designed to catch and bounce back headlight beams with incredible intensity, making a human shape instantly recognizable from hundreds of metres away. This is the “visibility mistake”: exiting a vehicle on a high-speed road without one. It is a gamble with your life that you will almost certainly lose.
The stark contrast in the image above is not an exaggeration. It is the reality of night-time visibility from a driver’s perspective. The person in dark clothing is a ghost, a potential tragedy waiting to happen. The person in the hi-vis vest is a clear, unmissable signal. The difference between the two is the difference between life and death. Keeping vests in the passenger cabin, not the boot, for immediate access upon exiting, is a rule born from this harsh reality.
When to Stay in Your Vehicle vs Exit During Breakdowns: The 3 Location Safety Rules
A breakdown forces a critical decision with no easy answer: is it safer inside or outside the vehicle? The correct choice depends entirely on your location. A car offers a metal cage of protection in some scenarios but becomes a death trap in others. Understanding the three fundamental location-based safety rules is not just good practice—it’s essential for survival.
The first step in any breakdown is to get your vehicle to the safest possible position. This means the hard shoulder on a motorway, a lay-by, or as far off the main road as possible. Once stationary, the decision to stay or exit is governed by your environment. This is where highway safety procedures provide a clear, life-saving guide.
Here are the three critical safety rules based on location:
- Rule 1: On a Motorway or High-Speed Dual Carriageway, ALWAYS Exit. The hard shoulder is the most dangerous place to be. Your vehicle is a stationary target for high-speed traffic. Official advice is unequivocal: exit the vehicle via the left-hand doors (away from traffic), move all passengers up the embankment or behind a safety barrier, and stand well away from your vehicle. Do not attempt any repairs. Your life is more valuable than your car.
- Rule 2: On a Quiet B-Road or in a Safe Urban Area, Stay Inside. If you have broken down on a quiet, well-lit street with no immediate traffic threat, or if you feel personally vulnerable outside the vehicle (e.g., late at night, risk from another person), it can be safer to remain inside with the doors locked and hazard lights on. Your car still provides protection from the elements and potential personal threats.
- Rule 3: If You Cannot Leave the Live Carriageway, Stay Put and Call 999. This is the worst-case scenario. If your vehicle is disabled in a live lane of traffic and you cannot move it, do NOT exit. You are safer inside the steel frame of your car than standing in the middle of traffic. Turn on hazard lights, keep your seatbelt on, and call 999 immediately. Inform them of your exact location and that you are in a live lane.
These rules are not suggestions; they are proven procedures based on decades of accident analysis. The common thread is to remove yourself from the primary “impact zone” whenever possible. On a motorway, that zone is your car and the area immediately around it. Exiting and moving behind a barrier takes you out of that zone. In a live lane, the entire road is the impact zone, and the car is your only, albeit slim, shield.
How to Perform a 10-Minute Pre-Trip Safety Inspection Using the POWER Checklist
The most effective way to handle a roadside emergency is to prevent it from ever happening. While you can’t eliminate all risks, a huge proportion of breakdown calls are due to simple, preventable maintenance issues. A systematic, 10-minute pre-trip inspection is the most powerful tool in a driver’s safety arsenal. The POWER checklist is a simple, memorable acronym that guides you through the five most critical systems on your vehicle.
Making this a regular habit, especially before a long journey, shifts your mindset from reactive to proactive. You are no longer just a driver; you are the first line of defence for your vehicle’s reliability and your own safety. This simple check can catch a small issue before it becomes a catastrophic failure on a motorway at midnight. The impact of this is enormous; according to Federal Motor Carrier Safety Administration data from the US, thorough pre-trip inspections are estimated to prevent thousands of accidents every year. It’s a small investment of time for a massive return in safety.
Instead of a vague “walk-around,” the POWER checklist provides a structured approach. It trains you to use all your senses—looking for leaks, listening for strange noises, feeling for unusual vibrations, and even smelling for things like burning oil or fuel. It is a diagnostic conversation with your car.
Your POWER Checklist for Pre-Trip Inspection
- Petrol/Fuel: Visually check your fuel gauge to ensure you have enough for the journey. Take a moment to walk around the car and smell for any signs of petrol leaks, which are a serious fire hazard.
- Oil: With the engine cool and on a level surface, check the engine oil level using the dipstick. The oil should be between the minimum and maximum marks and a translucent amber-brown colour. Black, gritty oil is a sign it needs changing. Also, listen for any unusual tapping or knocking sounds from the engine on start-up.
- Water/Coolant: Check the coolant level in the expansion tank; it should be between the ‘min’ and ‘max’ lines. Never open the radiator cap when the engine is hot. Visually inspect the engine bay and the ground underneath for any signs of green, pink, or orange fluid leaks.
- Electrics: This is a vital check. Test all your lights: headlights (dipped and main beam), indicators, brake lights (ask someone to help or reverse towards a reflective surface), and fog lights. Check the battery terminals for any white, crusty corrosion that could prevent a good connection.
- Rubber/Tyres: This is arguably the most critical check. Use a reliable gauge to check that all four tyres are inflated to the pressure recommended in your owner’s manual (check them cold). A 10-degree change in temperature can alter pressure by 1 PSI. Visually inspect the tread for wear and the sidewalls for any cuts, bulges, or cracks.
How to Position Your Vehicle to Maximise Escape Routes in Traffic Using 5 Rules
Your safety on the road doesn’t just depend on your car’s mechanical condition; it’s profoundly influenced by your position relative to other vehicles. Defensive driving is the art of anticipating danger and maintaining options. The most important option you can have is an “escape route”—a clear path into an adjacent lane or onto the shoulder that allows you to evade a developing hazard, such as a sudden traffic stop or a driver not paying attention behind you.
Constantly managing the space around your vehicle is a core tenet of advanced driving. It’s about playing a dynamic, real-time game of chess on the motorway, where you are always thinking one or two moves ahead. Being passive and simply “going with the flow” can leave you boxed in and vulnerable, with no way out when a situation turns critical. Adopting a few simple rules for vehicle positioning can dramatically increase your margin of safety.
Here are five defensive driving rules to maximise your escape routes:
- Maintain a Safe Following Distance: The “two-second rule” is the absolute minimum on a dry road. In wet or poor visibility, extend this to four seconds. This space is not just for braking; it’s your buffer, giving you time and room to react to hazards ahead.
- Avoid Being Boxed In: Be hyper-aware of being surrounded by large vehicles like HGVs. Driving between two lorries effectively eliminates all your escape routes and places you in massive blind spots. Adjust your speed to clear the situation.
- Stagger at Traffic Lights: When you stop at a red light, leave at least one full car length of space between you and the vehicle in front. This gives you a crucial escape path to pull into if you see a vehicle approaching too fast in your rearview mirror, potentially avoiding a rear-end collision.
- Scan Your Mirrors Constantly: Your mirrors are your lifeline to what’s happening behind you. A constant, sweeping check of your rearview and side mirrors allows you to build a mental map of the traffic around you and spot potential threats, like a tailgater or a fast-approaching vehicle, long before they become a critical danger.
- Position for Shoulder Access: Whenever possible, and especially on motorways, maintain a lane position that gives you the easiest and quickest path to the hard shoulder. If you feel a sudden mechanical issue, your first instinct should be to get off the live carriageway immediately, and your lane position can make that possible.
By actively managing your position and maintaining these buffers, you are no longer a passive participant in traffic. You are a strategic driver, constantly preserving your options and, by extension, your safety.
Key Takeaways
- Proactive Prevention Beats Reactive Cure: A 10-minute pre-trip inspection (POWER check) prevents more breakdowns than any emergency kit can fix.
- Visibility is a System, Not an Item: Your safety depends on a chain of visibility: hazard lights, a hi-vis vest for every occupant, and a correctly placed warning triangle.
- Know When to Exit: On a motorway, your car is a target. Always exit to the left and get behind a safety barrier. Your personal safety is more important than the vehicle.
- Gear is Only Half the Battle: Owning a kit is meaningless without knowing how and why to use each item. Knowledge is the most critical component.
How Pre-Trip Vehicle Inspection Prevents 75% of Breakdown Callouts
We’ve established the critical importance of a pre-trip inspection, but the sheer scale of its impact is often underestimated. The title’s claim—that it can prevent 75% of breakdown callouts—may seem bold, but when you analyse the data, it becomes clear that most roadside stops are not caused by unforeseeable catastrophic failures. They are the predictable result of neglecting basic checks.
The numbers are staggering. In the US alone, comprehensive breakdown analysis reveals that drivers experience around 69 million breakdowns every single year. That’s over 189,000 drivers stranded every day. This isn’t just an inconvenience; it places a huge number of people in potentially vulnerable situations on the roadside. Furthermore, the problem is more acute with older vehicles. Studies by providers like Green Flag show that vehicles over a decade old are twice as likely to break down, underscoring the need for increased vigilance as a car ages.
The most compelling evidence comes from cross-referencing the most common causes of breakdowns with the POWER checklist we discussed earlier. The link is not just theoretical; it’s a direct correlation. A simple check of your battery, fluids, and tyres directly addresses the majority of reasons a driver will find themselves calling for roadside assistance.
The following table, based on breakdown data, illustrates exactly how the POWER checklist provides a direct countermeasure to the most frequent points of failure in a vehicle.
| Breakdown Cause | Percentage of Total | Preventable by POWER Check |
|---|---|---|
| Battery Issues | 30% | Yes – Electrics check |
| Cooling System Failures | 11% | Yes – Water check |
| Tire Problems | Significant portion | Yes – Rubber check |
| Fuel/Oil Issues | Major category | Yes – Petrol and Oil checks |
As the table clearly demonstrates, the leading causes of breakdowns fall squarely within the scope of the pre-trip inspection. A dead battery, the number one culprit, can often be preempted by checking for corrosion on the terminals. Tyre issues, another major category, are almost entirely preventable with regular pressure and condition checks. The connection is undeniable: spending ten minutes in your driveway can save you hours on the hard shoulder and prevent you from becoming another statistic.
By embracing this proactive and systematic approach to vehicle safety, you are fundamentally changing your relationship with risk. You are moving from a position of hoping a breakdown doesn’t happen to ensuring you’ve done everything in your power to prevent it. Start today by performing a full POWER check and auditing your emergency kit; it is the most important journey you can take without ever leaving your driveway.