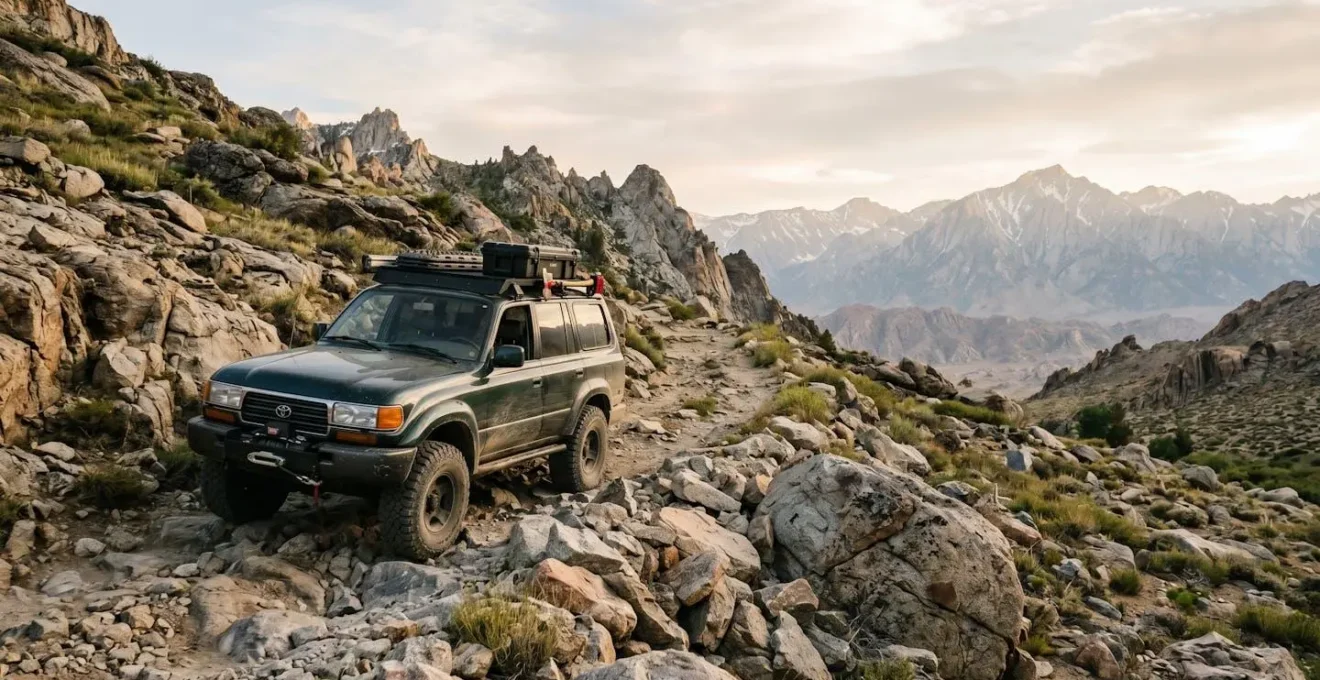
The true capability of an off-road SUV is revealed by its mechanical engineering and geometry, not its marketing brochure.
- Ground clearance is meaningless without considering the vehicle’s breakover angle and wheelbase—the “Triangle of Mobility.”
- A 4WD badge is not a guarantee; you must physically test the system for engagement, binding, and low-range function before buying.
Recommendation: Prioritise vehicles with proven long-term reliability and simpler systems, then verify their mechanical condition yourself. Skill and assessment beat raw power every time.
The vision is alluring: your family, a capable SUV, and a remote, pristine campsite accessed via a winding mountain track. But for many, this dream turns into a nightmare of spinning wheels, grinding undercarriages, and the sinking feeling of being stranded miles from help. The market is flooded with SUVs that look the part but lack the fundamental engineering for genuine off-road challenges. Many buyers are told to simply “get a 4×4” or look for “high ground clearance,” but this advice is dangerously superficial.
These platitudes fail to address the core principles of vehicle dynamics on uneven terrain. The real secret to choosing a vehicle that won’t let you down lies not in a simple checklist of features, but in developing an instructor’s eye for mechanical integrity and terrain-focused design. It’s about understanding *why* certain specifications matter and how they work together under load. This guide moves beyond the showroom talking points to equip you with the practical knowledge to assess a vehicle’s true capability.
We will dissect the critical engineering traits that define a reliable trail vehicle, from the geometry that keeps its belly off the rocks to the drivetrain that delivers power when it matters most. You will learn how to test these systems yourself, what common mistakes to avoid, and how to think about vehicle navigation like a seasoned professional, ensuring your adventures end with a campfire, not a recovery bill.
This comprehensive guide is structured to build your expertise from the ground up. You will learn to assess a vehicle’s core mechanical attributes, compare legendary platforms, and master the techniques required for safe and confident navigation on challenging terrain.
Summary: A Guide to Selecting a Mountain-Ready All-Terrain SUV
- Why Ground Clearance Above 220 mm Is Critical for Rocky Mountain Trails
- How to Test Four-Wheel-Drive Systems Before Buying an SUV in 5 Practical Checks
- Land Rover Defender vs Toyota Land Cruiser: Which for UK Terrain Reliability Over 10 Years?
- The Tyre Mistake That Leaves SUVs Stuck in Mud Despite Having 4WD
- When to Engage Low-Range Gears: The 3 Terrain Types That Demand It
- How to Assess Track Surface Before Committing Your Vehicle in 4 Steps
- How to Calculate Fuel Range With 30% Safety Margin for Desert Crossings in 5 Steps
- How to Navigate Rugged Topography by Road Without Damaging Your Vehicle
Why Ground Clearance Above 220 mm Is Critical for Rocky Mountain Trails
Ground clearance is the most frequently quoted off-road metric, but it’s also the most misunderstood. It represents the shortest distance between the ground and the lowest point of the vehicle’s undercarriage, typically the differential or exhaust. For rocky mountain tracks, a figure above 220 mm (approximately 8.7 inches) is a critical baseline. This height provides the necessary buffer to clear embedded rocks, deep ruts, and crests that would otherwise impact and potentially damage vital components like oil pans, fuel tanks, and drivetrain parts.
However, focusing on this single number is a rookie mistake. True trail capability is determined by the “Triangle of Mobility”—the dynamic relationship between ground clearance, wheelbase, and the vehicle’s approach, breakover, and departure angles. A long-wheelbase SUV with high clearance can still get “beached” on a sharp crest if its breakover angle is poor. Conversely, a more compact vehicle with slightly less clearance might be more agile and effective.
Case Study: The Geometry Advantage
The Jeep Compass Trailhawk serves as an excellent example of this principle. It has a ground clearance of 225mm, but its real advantage comes from its short wheelbase (2636mm). This combination creates a superior breakover angle, allowing it to clear obstacles that can strand larger SUVs with more clearance (e.g., 230mm+) but longer wheelbases (over 2850mm). This strategic engineering that maximizes geometry demonstrates that how a vehicle uses its clearance is more important than the raw number itself.
As the image above illustrates, the crucial factor is not just the gap, but how the vehicle’s entire geometry—from the overhangs of the bumpers to the length between the wheels—interacts with an obstacle. When assessing a vehicle, you must look beyond the spec sheet and visualise how it will pivot over rocks and crests. A short front overhang for a good approach angle is just as important as the clearance beneath the doors.
How to Test Four-Wheel-Drive Systems Before Buying an SUV in 5 Practical Checks
A “4×4” badge on the tailgate means nothing if the system underneath is non-functional. Transfer cases, actuators, and differentials are complex and expensive to repair, making a pre-purchase function test non-negotiable. Many sellers, whether private or dealer, may be unaware of or fail to disclose issues. You must assume the role of an inspector and verify the system’s health yourself. This requires more than just pushing a button on the dashboard; it involves a series of physical checks to confirm mechanical engagement and performance under load.
Your Action Plan: Verifying 4WD Functionality
- Visual Drivetrain Inspection: Before driving, get underneath the vehicle (safely). Examine the transfer case, driveshafts, axles, and differentials for any obvious signs of leaks, physical damage, or loose connections. Pay close attention to fluid seepage around the seals.
- Pavement Engagement Test: On a dry, flat surface, engage 4WD High. Drive slowly (1-2 mph) in a tight circle. The vehicle should feel resistant, and you may hear a slight “binding” or feel a lurching motion. This is normal and indicates the front and rear axles are locked together and receiving power.
- Low-Range Engagement Verification: From a complete standstill with the transmission in neutral or park (consult owner’s manual), engage 4WD Low. The engagement should be confirmed by a light on the dashboard. Drive forward slowly in first gear; the vehicle should crawl at a very low speed (approx. 5 mph), confirming the significant gear reduction is working.
- Traction Simulation Test: Find a low-traction surface like gravel or wet grass. With a partner observing from a safe distance, accelerate gently. They should confirm that all four wheels are attempting to spin, not just the front or rear. This verifies that power is being distributed correctly under slip conditions.
- Crawl and Inspect Post-Test: After a short test drive, park the vehicle and safely get underneath again. Look for any new or fresh fluid leaks from the transfer case or differentials. Check protective plates for deep scrapes which can indicate a history of hard off-road abuse.
The binding sensation in step two is a key indicator. As explained by technical resource Four Wheel Trends, this feeling is a positive sign. According to their diagnostic guide:
If the 4-wheel drive is engaged, the driver will feel the left and right wheels bind up while driving. The bucking or lurching motion of the car is normal and indicates the front end is under power.
– Four Wheel Trends, Four-Wheel Drive Diagnostic Guide
This happens because in a turn, the front and rear wheels travel different distances, and a locked 4WD system forces them to try and rotate at the same speed, creating resistance. Absence of this feeling could indicate a problem.
Land Rover Defender vs Toyota Land Cruiser: Which for UK Terrain Reliability Over 10 Years?
In the world of serious off-roading, two names dominate the conversation: the Land Rover Defender and the Toyota Land Cruiser. Both are legendary, but they represent fundamentally different philosophies of engineering, reliability, and ownership cost, especially when considering a decade of use on demanding UK terrain. The damp climate, salted winter roads, and mix of green lanes and motorway driving present a unique set of challenges. A decision between them must be based on data and a realistic understanding of long-term upkeep, not just brand loyalty.
To cut through the anecdotal evidence, a direct comparison of reliability metrics and ownership costs is essential. The following data, compiled from various industry sources including J.D. Power, provides a stark look at how these two vehicles stack up over time. As this comparative analysis of ownership factors reveals, initial quality and long-term dependability can be very different things.
| Factor | Land Rover Defender | Toyota Land Cruiser |
|---|---|---|
| J.D. Power Reliability Rating (2025) | 82/100 | 73-85/100 (varies by source) |
| J.D. Power Initial Quality (problems per 100 vehicles) | Higher problem rate | 8 fewer problems per 100 vehicles than Land Rover brand |
| J.D. Power 3-Year Dependability | Ranked 31st (108 more problems per 100 vehicles) | Ranked 4th, above industry average |
| Powertrain Warranty Coverage | 4 years / 50,000 miles | 5 years / 60,000 miles |
| Scheduled Maintenance Included | Not included | 2 years / 25,000 miles included |
| Dealer Network Availability (service accessibility) | Limited (6x fewer dealers than Toyota) | Extensive (6x more dealers than Land Rover) |
| 5-Year Depreciation Rate | 50.9% value loss | 37.7% value loss |
| Known UK Climate Weakness | Electrical gremlins, air suspension leaks (£2,000+ repair), software glitches | Frame rust in damp climates (older vintages), transmission replacement (£8,000+) but rare |
The data clearly shows a pattern. While both are capable, the Land Cruiser consistently demonstrates superior long-term dependability and lower depreciation. The Defender, particularly newer models, is plagued by a higher rate of initial problems, often related to complex electronics and air suspension systems which are vulnerable in damp climates. In contrast, the Land Cruiser’s primary long-term vulnerability, especially in older models, is frame rust—a known issue in the UK that requires diligent inspection and underbody treatment. The expert consensus leans towards the Toyota for refurbished, long-term reliability due to its engineering philosophy. This focuses on durability and ease of repair over cutting-edge, but often fragile, technology.
The Tyre Mistake That Leaves SUVs Stuck in Mud Despite Having 4WD
One of the most common and frustrating failures on the trail involves a capable 4WD SUV, spinning its wheels uselessly in mud. The driver is often bewildered, having invested in a vehicle with a sophisticated four-wheel-drive system. The culprit, in almost every case, is the single most critical component for traction: the tyres. The mistake is assuming that “all-season” or even some “all-terrain” (A/T) tyres fitted at the factory are suitable for anything beyond a gravel road. They are not. Power is useless if it cannot be transferred to the ground.
The difference between a highway tyre (H/T), an all-terrain tyre (A/T), and a mud-terrain tyre (M/T) lies in their tread design. Highway tyres have a closed tread pattern with small gaps (sipes) designed for quietness and wet-road grip. This pattern immediately clogs with mud, turning the tyre into a slick, useless donut. Mud-terrain tyres have large, aggressive tread blocks and wide, deep voids between them. These voids are essential; they allow the tyre to bite into the soft surface and, crucially, to self-clean through rotation, flinging the mud out and presenting a fresh biting edge for the next rotation. All-terrain tyres are a compromise between the two.
Choosing the right tyre involves a trade-off. Aggressive M/T tyres provide unparalleled grip in mud and rocks but are often noisier on the road, wear faster, and can have reduced performance in icy conditions. High-quality A/T tyres offer a good balance for a vehicle that sees both trail and daily-driving duties. They have a more open tread than H/T tyres but are more civilised than M/T tyres. According to tire performance analysis, there’s a significant difference in longevity, with a typical lifespan for all-terrain tires of 45,000-65,000 miles, whereas M/T tires will last significantly less in mixed use. The critical mistake is failing to match the tyre’s capability to your intended terrain.
When to Engage Low-Range Gears: The 3 Terrain Types That Demand It
The “4-Lo” button or lever is one of the most powerful tools in a true 4×4, yet it is widely misunderstood and underutilised by novice drivers. Engaging low-range is not about gaining more traction; it’s about torque multiplication and control. The transfer case acts like a second gearbox, dramatically reducing the gear ratio (typically between 2.5:1 and 4:1). This multiplies the engine’s torque, allowing the vehicle to crawl over obstacles with minimal throttle input, and it provides significant engine braking on descents. Using it correctly is a cornerstone of “mechanical sympathy”—driving in a way that preserves the vehicle’s drivetrain from excessive strain.
Engaging low-range is not for normal driving or even for all off-road situations. It’s a specific tool for specific, high-load scenarios. Knowing when to use it prevents catastrophic component failure and ensures maximum control when you need it most. There are three primary terrain types that absolutely demand it:
- Steep Descents (Brake Preservation): Engage low-range before you start a long, steep downhill section. This allows you to use the engine’s natural resistance to control your speed, a technique known as engine braking. This prevents your brakes from overheating and potentially failing (brake fade), a life-threatening issue on mountain trails. Low-range multiplies this engine braking effect, allowing you to descend safely in first or second gear with minimal use of the brake pedal.
- High-Load, Low-Speed Crawling (Drivetrain Protection): Activate low-range whenever you need to move the vehicle slowly against high resistance. This includes crawling over large rocks, towing a heavy trailer uphill on a loose surface, or extracting another vehicle. Without low-range, you would have to slip the clutch (in a manual) or strain the torque converter (in an automatic), generating immense heat and causing premature wear. Low-range multiplies torque, reducing the strain on the entire drivetrain.
- Water Crossings (Stall Prevention): Engage low-range before you enter the water. The goal is to maintain a slow, steady momentum (typically 3-5 mph) to create a “bow wave” in front of the vehicle. This wave pushes water away from your air intake, preventing the engine from stalling or, catastrophically, hydrolocking. Trying to shift into low-range while already in the water is a recipe for disaster, as is stopping or losing momentum mid-crossing.
In all these cases, low-range is a preventative measure. It’s about reducing stress on the vehicle’s components and giving the driver maximum control in a low-speed, high-stakes environment. It’s a tool for finesse, not for speed.
How to Assess Track Surface Before Committing Your Vehicle in 4 Steps
The single greatest skill in off-road driving isn’t driving at all; it’s knowing when to stop. Before committing a multi-thousand-pound vehicle to a questionable section of track—be it a mud bog, a water crossing, or a rocky incline—a proper assessment is mandatory. The view from the driver’s seat is notoriously deceptive. What looks like a shallow puddle could be a deep, axle-breaking hole. The only way to gather reliable data is to get out of the vehicle and assess the surface firsthand. This simple act can be the difference between a successful adventure and a very expensive recovery operation.
Experienced off-roaders follow a disciplined protocol to read the terrain. This isn’t about guesswork; it’s a four-step process of data collection to make an informed decision about risk.
- The Boot Test: This is the most reliable real-time traction indicator. Exit the vehicle and walk on the surface in question. Your boots will tell you everything. Is the ground firm, spongy, or slippery? Does your boot sink? A general rule is that if your boot sinks more than a couple of inches, the full weight of your vehicle will sink proportionally deeper, risking a bog.
- Read the Water Line and Vegetation: In and around water crossings or dry riverbeds, look for tell-tale signs of flash floods. Debris caught high in bushes or a distinct line of discoloration on rocks well above the current track level indicates that the area is prone to sudden, powerful flows. The ground in these zones can be highly unstable and liable to collapse under weight.
- Look for the Bypass: Observe the tracks of those who came before you. If you see a well-worn set of tyre tracks that leave the main path to go around an obstacle (like a deep mud hole), trust this collective wisdom. It’s a strong signal from other drivers that the direct route is impassable or carries a high risk of damage. Don’t be the hero who tries to prove them wrong.
- The Probe Method: Never drive into water or mud of unknown depth. Carry a simple trekking pole or even find a sturdy stick. Before entry, physically probe the depth of the puddle across its entire width. This five-second check can reveal hidden rocks, submerged logs, or a sudden drop-off that would be invisible from the driver’s seat and could easily cause thousands of pounds in damage.
These steps aren’t about timidity; they are about professionalism and risk management. Committing your vehicle and your family’s safety to an unknown is reckless. Taking five minutes to gather data is smart.
Key Takeaways
- True capability is defined by the “Triangle of Mobility”: the interplay between ground clearance, wheelbase, and angles, not just one number.
- Tyres are your most important traction tool. The wrong choice will defeat even the most advanced 4WD system, especially in mud.
- Mechanical sympathy—using tools like low-range proactively and assessing terrain before committing—is the ultimate key to vehicle preservation and long-term reliability.
How to Calculate Fuel Range With 30% Safety Margin for Desert Crossings in 5 Steps
When travelling in remote areas, whether desert, mountain, or forest, fuel is your lifeline. Running out of fuel is not an inconvenience; it’s a life-threatening emergency. The manufacturer’s stated MPG or L/100km is dangerously irrelevant in these conditions. Off-road driving, especially in low-range 4WD on soft sand or steep inclines, can increase fuel consumption by 50-100% or more. A professional approach to remote travel requires a rigorous, reality-based method for calculating fuel range, incorporating a non-negotiable safety margin.
This five-step process is the standard for expedition planning. It moves beyond hope and guesswork to provide a reliable framework for fuel management.
- Establish Your Terrain-Adjusted Consumption Rate: Before any major trip, you must determine your vehicle’s real-world fuel consumption in low-range 4WD on terrain similar to your planned route. Use a full-to-full tank measurement over a set distance. This is your baseline for all off-road calculations, not the number on the window sticker.
- Calculate the Point of No Return: This is not a fixed point on a map, but a dynamic calculation. It’s the halfway point of your *usable fuel*. At any given moment, you must know if you have enough fuel to either reach your destination or turn back and safely return to your last known fuel source. Crossing this point is a commitment.
- Factor in Ancillary Fuel Burn: Your engine doesn’t just power the wheels. In desert conditions, running the air conditioning can increase fuel burn by a significant 10-15%. Similarly, extended use of a winch puts a heavy load on the alternator, which in turn requires the engine to burn more fuel to replenish the battery. These must be factored in.
- Account for the Unusable Fuel Factor: A fuel tank is never 100% usable. On steep inclines or side slopes, the fuel pickup can be starved of fuel even when the gauge shows there’s some left. Furthermore, the last portion of fuel often contains sediment you don’t want in your engine. A safe rule is to consider only 90% of your tank’s stated capacity as ‘usable’ (e.g., plan for 90L from a 100L tank).
- Apply the 30% Safety Margin: After calculating your total required fuel for the journey using the realistic consumption rate (steps 1-4), multiply that total by 1.30. This mandatory 30% buffer is your safety margin. It accounts for unforeseen circumstances: getting lost and having to backtrack, encountering unexpectedly difficult terrain that requires more fuel, or having enough reserve to wait for rescue or help another traveller.
Treating fuel calculation with this level of discipline is the mark of a self-reliant and responsible off-roader. It’s a skill that’s just as important as knowing how to change a tyre or engage 4WD.
How to Navigate Rugged Topography by Road Without Damaging Your Vehicle
Choosing the right vehicle is only half the battle. The other half is driving it with skill and “mechanical sympathy”—an awareness of the forces acting on your vehicle and an active effort to minimise stress on its components. Rugged terrain is an unforgiving environment for machinery. A single harsh impact or moment of excessive force can lead to a snapped axle, a broken driveshaft, or a punctured differential, resulting in a costly and potentially dangerous trail-side failure. The goal of a skilled driver is not to conquer the terrain through brute force, but to navigate it with finesse, preserving the vehicle for the journey home and many more to come.
This philosophy translates into three core driving techniques that should become second nature for anyone venturing off the tarmac.
- Master Smooth Inputs to Avoid ‘Shock Loading’: The drivetrain (axles, driveshafts, differentials) is strongest under steady load but vulnerable to sudden, sharp forces. This ‘shock loading’ occurs with abrupt acceleration, harsh braking, or aggressive steering. For example, spinning your wheels and then suddenly gaining traction sends a shockwave through the drivetrain that can break parts. The key is to be smooth and deliberate with the throttle, brake, and steering. Gentle, progressive inputs distribute stress evenly and prevent catastrophic failure.
- Choose the High Line to Protect the Undercarriage: When driving on a rutted track, the novice instinct is to put the wheels in the ruts. This is often a mistake, as it can lead to the vehicle’s undercarriage dragging on the central ‘hump’. Instead, a skilled driver will ‘straddle’ the ruts, placing the tyres on the high points of the track. This ‘high line’ technique effectively maximises your ground clearance right where the most vulnerable components are located, keeping your differentials and other low-hanging parts clear of obstacles.
- Use a 45-Degree Angle for Obstacles: Approaching obstacles like ditches, logs, or ledges straight on is the fastest way to damage your front bumper or get hung up. Instead, approach and depart at a 45-degree angle. This allows one wheel to climb the obstacle at a time, keeping the other three on the ground for maximum traction and stability. This diagonal approach also makes the most of your vehicle’s approach and departure angles, preventing the front or rear from digging in.
These techniques are not about driving slowly; they are about driving intelligently. By adopting a mindset of mechanical preservation, you not only dramatically reduce the risk of breaking your vehicle but also become a safer, more capable, and more confident off-road driver.
The next step isn’t just to browse classifieds, but to start training your eye to see vehicles not as a list of features, but as integrated mechanical systems. Use these checks on your next test drive to assess a vehicle’s true character and ensure your next adventure is a memorable one for all the right reasons.