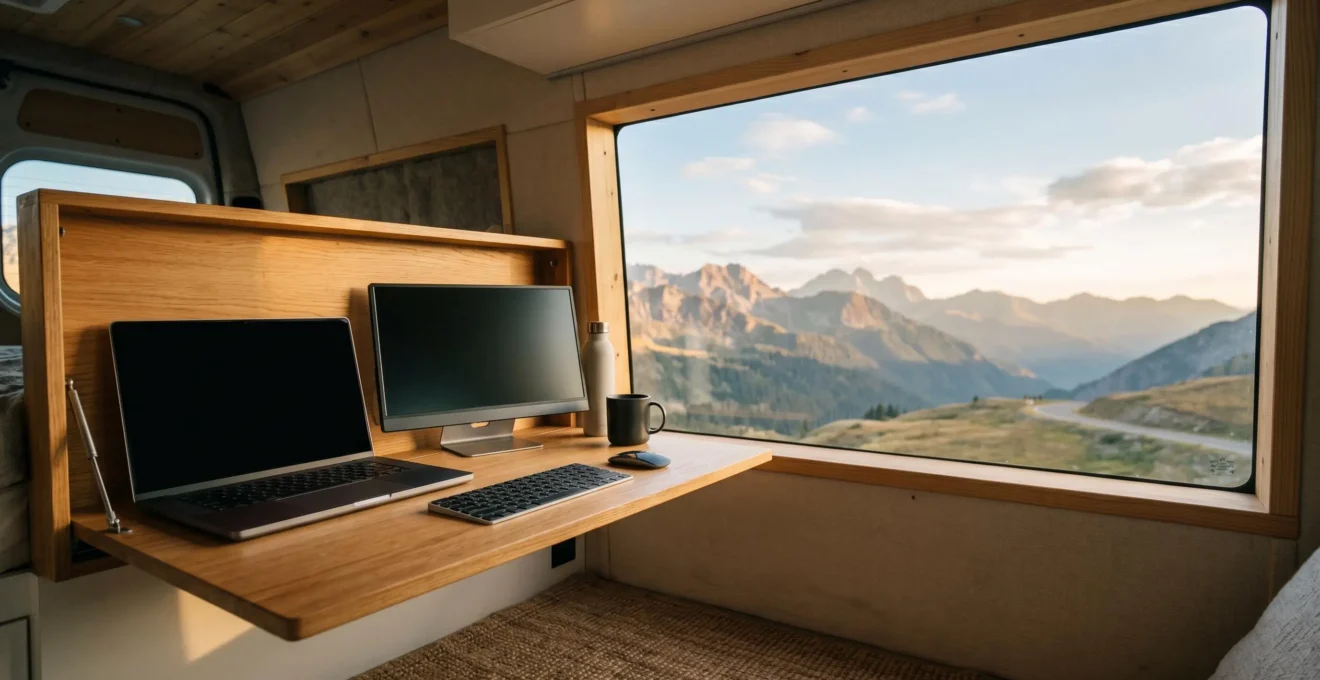
Achieving a significant productivity boost in a van is not about buying better gadgets; it’s about engineering an integrated workstation system that eliminates critical bottlenecks.
- Ergonomic bottlenecks are solved with dual monitors and a dedicated “ergonomic triangle” setup to reduce cognitive load and prevent physical strain.
- Power bottlenecks are eliminated by designing a robust “energy architecture” with correctly sized solar and lithium batteries to support a full workday off-grid.
- Connectivity bottlenecks are overcome by implementing a redundant internet strategy, combining solutions like Starlink and 4G for unwavering reliability.
Recommendation: Begin by auditing your current workflow to identify your single biggest productivity bottleneck, then engineer a specific solution to solve it.
The allure of vanlife for a remote worker is the promise of freedom—the ability to work from a Highland loch or a Cornish beach. Yet, the reality is often a compromise: hunched over a laptop on a bed, fighting for a stable internet connection, and constantly worrying about battery levels. This friction creates a persistent drag on productivity, turning the dream into a daily struggle. Many guides focus on superficial gear lists: a portable hotspot, a laptop stand, and a comfy pillow. This approach fundamentally misses the point.
A truly productive mobile office is not a collection of accessories; it’s a meticulously designed and integrated system. The difference between a frustrating workday and one that’s 40% more effective lies in treating your van’s workspace as an engineering challenge. The goal is to systematically identify and eliminate the three core bottlenecks that plague digital nomads: ergonomic friction, power anxiety, and connectivity failure. By shifting the mindset from “making do” to “optimising for performance,” you can transform your vehicle from a place you simply work *from* into a high-performance environment you work *in*.
This guide moves beyond generic advice to provide a systems-based blueprint for designing that environment. We will deconstruct the three critical sub-systems—ergonomics, power, and connectivity—to build a workstation that not only functions but excels. By understanding the principles behind each component, you can create a mobile office that actively enhances your focus, stamina, and output, unlocking the true potential of remote work on the road.
This article provides a detailed roadmap for constructing a high-performance mobile office. Explore the sections below to master each critical component of your productivity system.
Summary: How to Build a Digital Nomad Workstation That Boosts Productivity by 40%
- Why a Second Monitor Increases Vanlife Work Output by 35% for Remote Workers
- How to Power Laptops and Monitors Off-Grid Using Solar and Lithium Batteries for 8 Hours
- Starlink vs 4G Bonding: Which Delivers More Reliable Rural Internet for Remote Work in the UK?
- The Ergonomic Mistake That Causes Back Pain After 3 Months of Van Working
- When to Use Co-Working Spaces vs Van Workspace: The Productivity Threshold for Video Calls
- Why £15,000 Is the Realistic Minimum for a Safe, Liveable Van Conversion in the UK
- Why Satellite Broadband Transforms Remote Working Viability in the Highlands
- How to Transition to Vanlife Without Financial Regret or Burnout
Why a Second Monitor Increases Vanlife Work Output by 35% for Remote Workers
The single greatest, and most overlooked, productivity bottleneck in a standard vanlife setup is the single laptop screen. Constantly switching between windows, tabs, and applications—a process known as context switching—creates a significant cognitive load. Each switch forces your brain to disengage and re-engage, fragmenting focus and draining mental energy. This constant micro-interruption is the enemy of deep work, and it’s a problem that is exponentially more frustrating in a confined space.
Adding a second monitor is the single most impactful ergonomic upgrade you can make. It’s not a luxury; it’s a fundamental tool for creating a professional workflow. This setup allows you to dedicate one screen to your primary task (writing code, designing a graphic, drafting a document) while the other handles communication, research, or reference material. The result is a fluid, seamless workflow that mimics a traditional office environment and drastically reduces cognitive friction. The efficiency gains are not trivial; dedicated research supports this.
For instance, an in-depth analysis found that using an external monitor can have a massive impact on output. One study confirmed that a productivity increase of up to 32% was seen among remote workers who adopted a larger external or dual-screen setup. In the context of a van, where every square inch and every hour of focus counts, this translates directly into more work completed in less time, freeing you up to enjoy the very freedom you sought with vanlife in the first place. The key is to select a lightweight, low-power modern display that can be easily mounted and powered by your off-grid system.
How to Power Laptops and Monitors Off-Grid Using Solar and Lithium Batteries for 8 Hours
Once you’ve committed to a professional setup with a laptop and external monitor, the next critical system to engineer is your power. An inadequate “energy architecture” is a primary source of stress and a hard stop to productivity. The goal isn’t just to have power, but to have a reliable, silent, and sufficient supply for a full 8-hour workday without compromise. This requires a systematic approach, not guesswork.
The process begins with a detailed audit of your daily power consumption. You must calculate the total watt-hours (Wh) required for all your work devices over an 8-hour period. This forms the basis for sizing your entire system, from the battery bank to the solar array. A common mistake is underestimating consumption or failing to account for system inefficiencies.
A robust power system for a dual-screen workstation involves several key steps:
- Calculate Daily Needs: Determine the total watt-hours for all devices. A typical powerful laptop uses 50-65W, a modern external monitor 20-40W, and phone charging around 10W. For an 8-hour day, this can easily exceed 700Wh.
- Size the Battery: To safely power this load and account for cloudy days, a minimum 2kWh lithium battery bank is recommended. This allows you to use only 50% of the capacity (depth of discharge), significantly extending the battery’s lifespan compared to lead-acid alternatives.
- Match Solar Generation: To replenish a 2kWh battery, a 300W solar setup is a practical minimum in the UK, producing roughly 1,200-1,800Wh per day in good conditions. This accounts for real-world losses of 20-30% from the panel’s rated maximum.
- Integrate Smart Charging: For modern vans like the Ford Transit or Mercedes Sprinter with smart alternators, a DC-to-DC charger is non-negotiable. It ensures your lithium batteries receive the correct charging voltage from the engine, protecting your investment.
- Account for Inverter Loss: When powering AC devices like laptop chargers, a pure sine wave inverter introduces a 10-15% energy loss during conversion. Using DC-powered chargers and monitors directly can maximize efficiency.
The physical integration of these components is just as important, especially the thermal management of lithium batteries. They must be kept in a ventilated, insulated compartment to operate safely and efficiently.
As this image illustrates, the dense arrangement of battery cells and control electronics generates heat. Proper ventilation and insulation are not optional extras; they are fundamental to the safety and long-term performance of your entire off-grid energy architecture, ensuring your workspace remains powered and safe, day after day.
Starlink vs 4G Bonding: Which Delivers More Reliable Rural Internet for Remote Work in the UK?
A productive workstation is useless without reliable, fast internet. For digital nomads in the UK, especially those venturing into rural Scotland, Wales, or the West Country, connectivity becomes the most challenging bottleneck. The two leading solutions are Starlink satellite and bonded 4G/5G mobile broadband. Choosing the right one—or a combination of both—depends entirely on your specific work requirements and travel patterns.
Starlink offers near-universal coverage, a game-changer for truly remote locations with no mobile signal. However, it comes with higher upfront costs, a monthly subscription, and sensitivity to obstructions like dense trees. 4G/5G broadband, when paired with a high-gain external antenna, can deliver excellent speeds and lower latency in areas with even a weak signal, but it’s dependent on mast location. The following comparison provides a clear breakdown for UK remote workers.
This recent comparative analysis highlights the distinct advantages of each technology for rural UK use cases.
| Criteria | Starlink Satellite | 4G Broadband (with external antenna) |
|---|---|---|
| Typical Download Speed | 50-200 Mbps (can exceed 200 Mbps) | 40-80 Mbps (4G), up to 350+ Mbps (5G in strong signal areas) |
| Latency | 20-40ms (low for satellite, can vary during handoffs) | Lower and steadier when signal quality is good; better for real-time tasks |
| Coverage in Rural UK | Works anywhere with clear sky view; excellent for truly remote locations | Depends on proximity to masts; external antenna significantly improves weak signal areas |
| Installation Complexity | Quick self-install (dish + router); requires unobstructed sky view | May require professional antenna mounting for optimal performance in rural areas |
| Weather Impact | Can experience performance dips during heavy rain/snow | Generally unaffected by weather; signal quality tied to terrain and mast distance |
| Best Use Case (UK Rural) | Isolated properties with zero mobile coverage; mountainous terrain; temporary/mobile setups | Properties with workable outdoor mobile signal; cost-conscious users; multi-building sites needing mesh expansion |
| Redundancy Strategy | Often used as failover backup for 4G primary connection | Recommended as primary with Starlink backup for mission-critical operations |
For mission-critical work, the optimal strategy is often not an “either/or” choice but one of connectivity redundancy. This involves using one technology as the primary and the other as a failover. As UK-based connectivity experts at Drakos Systems advise, this dual approach provides the ultimate safety net for professionals who cannot afford downtime.
For businesses in rural Northern Ireland, we often recommend a combination approach – a 4G/5G router as the primary connection with Starlink as a failover backup. This gives you the speed of mobile broadband with the reliability of satellite as a safety net.
– Drakos Systems, Internet for Remote Locations UK 2026 Technical Guide
This hybrid model ensures that whether you’re dealing with network congestion on a 4G mast or a Starlink satellite handoff during a critical video call, your connection remains stable. It’s the professional solution to eliminating connectivity as a productivity bottleneck.
The Ergonomic Mistake That Causes Back Pain After 3 Months of Van Working
The most insidious productivity killer in a van is poor ergonomics. It doesn’t crash your computer or drain your battery; it slowly drains your physical and mental stamina until work becomes a painful chore. The single biggest ergonomic mistake is ignoring the “Ergonomic Triangle”—the precise geometric relationship between your eyes, your hands, and your lower back. Working for hours on a laptop placed on a simple tabletop collapses this triangle, forcing your neck down, your shoulders forward, and your spine into a C-shape. This posture is unsustainable.
The consequences manifest as chronic pain. A cross-sectional survey of academic staff forced into remote work found that a staggering 59.1% experienced back pain and 54.5% reported neck pain. The study identified that the rapid shift left no time for proper ergonomic support, a situation identical to that of many unprepared vanlifers. After just a few months, this constant physical strain leads to reduced focus, shorter work sessions, and eventual burnout.
The solution is to consciously engineer your workspace to maintain the ergonomic triangle. This requires three specific components working in concert:
- A Swivel Seat: The driver or passenger seat, mounted on a high-quality swivel base, becomes your office chair. This provides essential back support and allows you to face your workspace properly.
- An Articulating Monitor/Laptop Mount: A VESA-compatible arm mount is crucial. It allows you to raise your laptop or external monitor so the top of the screen is at eye level, keeping your neck straight and preventing you from hunching over.
- A Separate Keyboard and Mouse: With the screen at eye level, an external keyboard and mouse on a desk surface (like a Lagun table) allow your arms to rest at a comfortable 90-degree angle, with wrists straight.
This setup separates the screen from the keyboard, re-establishing the proper posture that is impossible with a laptop alone. It is the only way to create a sustainable and pain-free work environment in a van.
As this minimalist setup demonstrates, the key is the spatial relationship between the elements. The chair provides support, the mount brings the screen to eye level, and the desk holds the keyboard at elbow height. This intentional design creates a workspace that supports your body, allowing for longer periods of focused, productive, and, most importantly, pain-free work.
When to Use Co-Working Spaces vs Van Workspace: The Productivity Threshold for Video Calls
Even the most perfectly designed van workspace has its limitations. Knowing when to leverage your mobile office and when to opt for a co-working space is a strategic decision, not a sign of failure. The primary factor driving this decision is what can be called the “Professionalism Threshold,” which is most often crossed by the demands of high-stakes video calls. With remote work trends showing a massive increase in reliance on video communication, presenting a stable and professional image is paramount.
Your van is an ideal environment for deep, focused work: coding, writing, and analysis. However, it can be a high-risk environment for a crucial client presentation or a final-round job interview. Factors like unpredictable background noise (a passing lorry, sudden rain), fluctuating internet latency, or a cramped-looking video background can unconsciously undermine your credibility. A co-working space provides a controlled environment: guaranteed high-speed, low-latency internet, a quiet background, and a professional setting. The monthly cost should be viewed as a business expense, an insurance policy against a failed call that could cost you a contract or a job.
Deciding when to make that investment requires an honest self-audit of your van’s capabilities against the demands of the task. The following checklist provides a clear framework for making that call.
Your Professionalism Threshold Audit: Van vs. Co-working
- Internet Latency Check: Before a critical call, run a speed test. If your connection shows latency (ping) consistently above 100ms or experiences significant packet loss, your audio/video may lag. Action: Relocate to a co-working space for that call.
- Acoustic Environment Assessment: Sit in your workspace and listen. Can you hear road noise, wind, or rain on the roof? Test with your microphone. Action: If you cannot create a near-silent bubble, use a controlled environment.
- Video Background Control: Frame yourself on camera. Is the background clean, well-lit, and free of clutter or personal items? Does it look spacious or cramped? Action: If your background detracts from a professional image, a neutral co-working setting is a better choice.
- Power Stability Verification: Check your battery monitor. Do you have a guaranteed minimum 2-hour power reserve for the full duration of the call, accounting for the higher drain of video? Action: Any power anxiety is a distraction; a co-working space eliminates it.
- Connectivity Redundancy Check: Before attempting an important call from the van, confirm your backup internet source (e.g., mobile hotspot) is ready and working. Action: If you have no immediate failover, the risk is too high.
Using this audit allows you to make data-driven decisions. The van is your 90% solution for productivity; the co-working space is your 10% solution for moments that demand absolute, guaranteed professionalism.
Why £15,000 Is the Realistic Minimum for a Safe, Liveable Van Conversion in the UK
In the world of van conversions, the allure of a low-budget DIY build is strong. However, when the van is not just a weekend camper but a full-time office, the calculus changes. The figure of £15,000 (on top of the base vehicle cost) often emerges as a realistic minimum for a safe, reliable, and liveable conversion in the UK. This number isn’t arbitrary; it represents the threshold where you move from hobbyist compromises to professional-grade systems, particularly in the three areas that directly impact productivity and safety: electrical, insulation, and ventilation.
Attempting to cut corners on these core systems creates long-term problems that far outweigh the initial savings. A poorly designed electrical system is a fire hazard and a constant source of power failure. Inadequate insulation and ventilation lead to condensation, mould, and an uncomfortable working environment that is too hot in summer and too cold in winter. The £15,000 budget accounts for certified, high-quality components and, crucially, the labour and expertise to install them correctly. It’s an investment in a non-negotiable foundation of safety and reliability.
The complexity of these systems is often underestimated. Consider the electrical system alone. An eight-year off-grid van power project documented by a hobbyist illustrates this perfectly. To create a stable system from recycled laptop batteries, the builder had to meticulously sort, test, and assemble over 1,000 individual cells and continuously expand the system over years. While the project was a technical success with zero cell failures, it demonstrates the immense time, discipline, and deep technical knowledge required for a safe DIY approach.
Case Study: The Hidden Cost of DIY Electrics
The “Second Life Storage” project proved that a DIY battery bank can be built to last. However, it required thousands of hours of labour in cell sorting, module building, and system monitoring. For a remote worker, this time is money. A professional conversion allocates a significant portion of the £15,000 budget to a certified electrical system built with new, warrantied components (like a 2kWh lithium battery, DC-DC charger, and pure sine wave inverter). This price purchases not just parts, but safety certifications, reliability, and, most importantly, frees up hundreds of hours that you can spend on your actual job rather than becoming an amateur electrical engineer.
Therefore, the £15,000 figure is not an expense, but an investment in productivity. It buys you a safe, comfortable, and reliable platform from day one, allowing you to focus on your work, not on whether the lights will stay on.
Why Satellite Broadband Transforms Remote Working Viability in the Highlands
For decades, the dream of working from the truly wild and remote parts of the UK, like the Scottish Highlands, has been just that—a dream. The lack of reliable mobile phone signal has made it a connectivity black hole, rendering professional remote work impossible. This is where Low Earth Orbit (LEO) satellite internet, pioneered by services like Starlink, has become a complete paradigm shift. It single-handedly transforms the viability of these areas for digital nomads.
Unlike traditional satellite internet that relied on distant geostationary satellites with high latency, LEO systems use a vast network of satellites orbiting much closer to Earth. With a constellation that now exceeds 9,000 satellites, Starlink can provide high-speed, low-latency internet to locations that have zero ground-based infrastructure. All that is required is a clear view of the sky, making it a perfect solution for the wide-open valleys and hillsides of the Highlands.
This image captures the essence of this new reality: a single piece of hardware connecting a remote worker to the global digital economy amidst a landscape previously cut off. For those seeking true solitude without sacrificing their career, this technology is the missing link. It fundamentally changes the map of where it’s possible to live and work.
The application is straightforward but profound. As connectivity specialists who operate in remote UK regions confirm, it is the ultimate solution when all other options fail.
When there’s genuinely no mobile coverage at all – deep rural valleys, mountainous terrain, or extremely isolated locations – Starlink satellite internet is a game-changer. No ground infrastructure needed: All you need is the dish, power, and a clear view of the sky.
– Drakos Systems Northern Ireland, Internet for Remote Locations UK 2026 Guide
This capability means a van equipped with a well-designed power system and a Starlink dish is no longer limited by proximity to towns. It becomes a truly self-sufficient mobile office, capable of operating for days or weeks in the most inspiring and secluded parts of the country, turning places like the Highlands from a holiday destination into a viable, productive workspace.
Key Takeaways
- A productive van workstation is an integrated system, not a collection of parts. Your focus must be on eliminating bottlenecks.
- The “Ergonomic Triangle” (eye-level screen, supported back, correct arm angle) is non-negotiable for preventing pain and burnout. A dual-monitor setup is the biggest single productivity lever.
- An off-grid “Energy Architecture” must be meticulously calculated to support a full 8-hour workday, with a 2kWh lithium battery and 300W+ of solar as a realistic baseline.
- Connectivity requires a redundancy strategy. Relying on a single source (4G or Starlink) is a risk; a professional setup combines them for guaranteed uptime.
How to Transition to Vanlife Without Financial Regret or Burnout
Successfully transitioning to a productive vanlife is not an event; it’s a process. Diving in headfirst without a plan is a recipe for financial stress and overwhelming burnout. The key to a sustainable transition is to adopt a phased, methodical approach that allows you to test, learn, and adapt your systems before you fully commit. This strategy de-risks the move, ensuring your productivity remains high and your finances stay intact.
Instead of selling your home and hitting the road overnight, consider a gradual immersion. This allows you to identify gaps in your workspace design, understand your real-world power consumption, and experience the challenges of life on the road while you still have the safety net of a permanent base. It turns the daunting leap into a series of manageable steps.
A structured, phased transition strategy is the most effective way to prevent the common pitfalls:
- Weekend Trial Phase: Begin with several short 2-3 day trips. Use these to test your basic mobile workspace, identify missing equipment, and get a first reading on your power usage patterns.
- One-Week Pilot: Plan a full 5-day workweek from the van, but keep your permanent accommodation. This is a crucial test of your entire system under a full load. Document every challenge—from finding water to dealing with a poor internet signal—and engineer a solution for each.
- Monthly Extended Test: Before making the final move, commit to a full month on the road. This will expose you to a complete cycle of maintenance (laundry, vehicle checks, route planning), weather variations, and the psychological demands of the lifestyle.
- Build a Transition Buffer Fund: Acknowledge that there will be a learning curve. Establish a separate emergency fund (ideally 3-6 months of expenses) to cover unexpected repairs, the initial productivity dip as you adapt, and any gear you discover you need.
- Implement an “Admin Day” Protocol: To protect your work/life balance, dedicate one fixed day per week purely to life administration. This compartmentalizes chores and prevents them from bleeding into your focused work time or precious leisure hours.
This deliberate, iterative process transforms the transition from a stressful gamble into a confident, well-planned evolution. You build your ideal workspace and lifestyle piece by piece, based on real-world experience, ensuring that by the time you commit full-time, you have already solved the major problems and are set up for success.
To transform your remote work experience, begin by auditing your current setup using these principles. Design your ideal mobile workstation not just for comfort, but for peak, sustainable performance, and plan your transition with the same methodical precision.