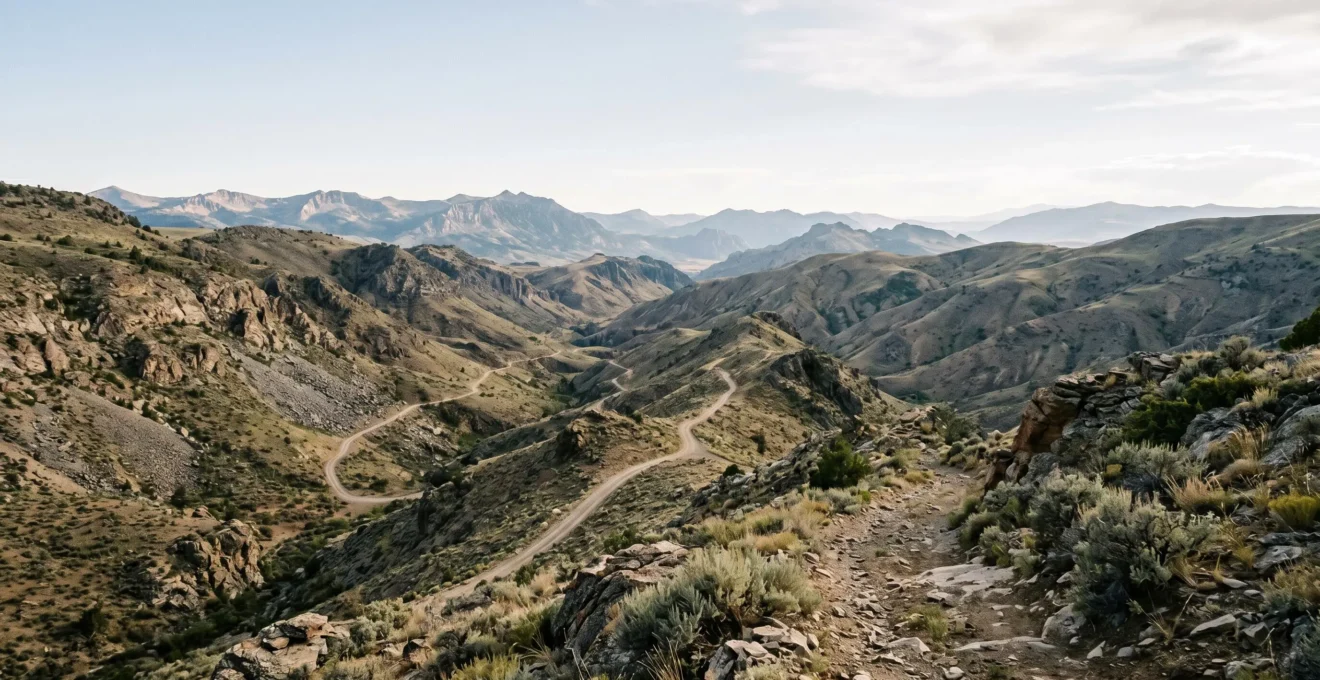
The greatest off-roading mistake isn’t a driving error; it’s a planning failure that happens before the engine starts, caused by an inability to translate 2D map lines into 3D vehicle dynamics.
- Contour line spacing doesn’t just show steepness; it predicts the specific risk of traction loss and vehicle rollover.
- Map symbols for water and trails are not just labels; they are warnings about hidden dangers like submerged obstacles, impassable banks, and illegal routes.
Recommendation: Shift from simply route-finding to ‘predictive navigation’ by learning to read the map as a direct simulation of the physical forces your vehicle will face.
For any off-road driver, the difference between a thrilling adventure and a costly recovery operation often comes down to one skill: the ability to read a topographical map. Many drivers can trace a route from point A to B, but few possess the deeper expertise to truly interpret the terrain and predict its challenges. They see lines on paper, not the physical reality of a steep gradient threatening to break traction, a hidden washout capable of high-centering their vehicle, or a seemingly minor stream with a dangerously soft bottom.
The common advice to “check the legend” or note that “close lines mean steep terrain” is dangerously simplistic. It’s the equivalent of learning the alphabet but never learning to read for meaning. This guide is not about basic symbol recognition. It’s built on a more fundamental principle I call ‘terrain translation’. This is the skill of converting the abstract data of a map into a tangible, 3D mental model of the drive ahead. It’s about anticipating vehicle dynamics—the forces of gravity, traction, and momentum—before you even turn the key.
By mastering this predictive approach, you stop reacting to obstacles and start proactively navigating them. You’ll learn why a 20% gradient demands a completely different driving technique, how to spot the subtle map clues that reveal a vehicle-swallowing bog, and when to trust the old-school paper map over the glowing screen of a GPS. We will dissect the map-reading errors that lead to trouble and equip you with the strategic mindset of an expert navigator, ensuring your focus remains on the adventure, not the emergency call.
This comprehensive guide will walk you through the essential skills of terrain translation. We will cover everything from interpreting gradient from contour lines to assessing water crossings, comparing navigation tools, and avoiding the most common and dangerous map-reading mistakes.
Summary: A Guide to Predictive Off-Road Navigation Using Topographic Maps
- Why Contour Line Spacing Reveals Gradient Steepness in 5 Seconds of Map Reading
- How to Identify River Crossings and Assess Depth Risk Using Map Symbols
- OS Paper Maps vs Digital Terrain Models: Which Offers Better Off-Road Planning Accuracy?
- The Map-Reading Error That Sends Drivers Onto Footpaths Instead of Vehicle Tracks
- When to Switch From Paper Maps to GPS: The 3 Terrain Types Where Digital Navigation Wins
- How to Identify Scenic Detours Using Topographic Elevation Data in 5 Map Tools
- Why Steep Gradients Above 20% Demand Specific Driving Techniques to Avoid Rollback
- How to Navigate Rugged Topography by Road Without Damaging Your Vehicle
Why Contour Line Spacing Reveals Gradient Steepness in 5 Seconds of Map Reading
The most fundamental skill in terrain translation is reading contour lines. These lines connect points of equal elevation, but their true value lies not in their individual height, but in their relationship to each other. The spacing between them is a direct, visual measurement of the gradient. Widely spaced lines indicate flat or gently sloping ground, where your vehicle will be stable and traction is high. In contrast, tightly packed contour lines signal a steep incline or decline. This is where the physics of your vehicle change dramatically.
On a steep slope, your vehicle’s center of gravity shifts rearward (on an ascent) or forward (on a descent), significantly reducing traction on the unweighted wheels. A side-slope (traversing across a hill) is even more perilous, as it shifts the center of gravity downhill, dramatically increasing the risk of a rollover. The ability to spot these tight contour clusters in seconds allows you to mentally flag a high-risk zone. It’s not just about knowing it’s steep; it’s about anticipating the need for low-range gearing, a steady throttle, and a prepared mindset for potential traction loss. Ignoring this simple visual cue is a primary cause of vehicle incidents, as more than two-thirds of fatal ROV incidents involved a rollover, often on challenging terrain.
To practice, open a map and look for a hill. Trace a path straight up the steepest part (where your route crosses the most contour lines in the shortest distance). Now, trace a path that zig-zags up the same hill, staying more parallel to the contours. You’ve just visualized the difference between a high-risk, direct ascent and a safer, lower-gradient switchback approach—a strategic decision made entirely from interpreting line spacing.
How to Identify River Crossings and Assess Depth Risk Using Map Symbols
Water is one of the most unpredictable and potentially damaging obstacles in off-roading. A map provides the first layer of intelligence, but it requires careful interpretation. A solid blue line indicates a perennial river or stream, while a dashed blue line often signifies an intermittent one that may be dry. However, the line on the map tells you nothing about the depth, current, or composition of the stream bed—factors that determine if a crossing is feasible or a vehicle-ending mistake.
An expert navigator uses the map to build a hypothesis. Look for where a track or trail officially fords the water; these are designated crossing points and generally safer. Be wary of tracks that simply stop at the water’s edge on both sides with no formal ford indicated. Analyze the surrounding contour lines. A crossing in a wide, flat valley (widely spaced contours) may be boggy and silty. A crossing in a steep, narrow V-shaped valley (tight contours) could have a rocky bottom but a dangerously fast current, especially after rain. In fact, water moving at just 6 mph can exert a force equivalent to an EF5 tornado wind speed per square foot.
The map gives you the ‘where,’ but on-site reconnaissance is non-negotiable. Before any attempt, you must walk the crossing. Check the depth against your vehicle’s specified fording limit—most standard 4x4s can handle 20 to 24 inches, while some premium models can manage over 30 inches. Probe the bottom with a stick for hidden rocks or deep mud. Finally, and most critically, assess the entry and exit banks. According to 4×4 water crossing safety protocols, many vehicles successfully ford the water only to become hopelessly stuck on a steep, slippery exit bank. The map might show a gentle slope, but erosion can create a vertical mud wall the map doesn’t show.
OS Paper Maps vs Digital Terrain Models: Which Offers Better Off-Road Planning Accuracy?
The debate between traditional paper maps and modern digital tools is often framed as a simple choice between old and new. For the serious off-road planner, the answer is more nuanced: it’s about using the right tool for the right task. Neither is universally superior; they have distinct strengths and weaknesses that an expert navigator leverages in concert.
A high-quality paper topographical map (like an Ordnance Survey or USGS quadrangle) offers unparalleled ‘big picture’ awareness. Spread out on the hood of your truck, it provides a wide, unpixelated view of the entire region. This macro context is crucial for strategic planning, allowing you to see multiple route options, identify vast areas of challenging terrain, and understand the landscape’s overall flow without being constrained by a small screen. Its greatest advantage is its reliability: it never runs out of batteries, loses signal, or suffers from software glitches. Paper is the bedrock of your navigation plan.
Digital Terrain Models (DTMs) and GPS apps, on the other hand, excel at tactical, real-time precision. While research on digital navigation accuracy shows that GPS technology can achieve positioning within 16 feet, its true power for off-roading lies in features like creating and following tracks, dropping waypoints, and confirming your exact location on the trail. Many apps offer multiple layers, allowing you to overlay satellite imagery onto the topographic map to visually verify if a track is overgrown or to see the texture of the ground. This micro-level detail is invaluable at a confusing trail fork or when confirming land ownership boundaries.
The optimal approach is a hybrid one. Use the paper map for initial strategic planning and as a failsafe backup. Use the digital tool for in-the-moment tactical execution, tracking your progress, and making precise navigational decisions on the ground. Relying solely on one or the other leaves you vulnerable—either to the technological failure of digital or the lack of pinpoint precision of paper.
The Map-Reading Error That Sends Drivers Onto Footpaths Instead of Vehicle Tracks
One of the most common and frustrating navigational mistakes is misinterpreting a trail symbol and finding yourself on a narrow hiking path, a dead-end, or worse, an illegal route. This error stems from a failure to meticulously study the map’s legend and cross-reference trail depictions with other topographic clues. A dashed line is not just a dashed line; its specific pattern—be it single dashes, dot-dashes, or double dashes—communicates a world of difference to the informed reader.
Vehicle tracks are typically shown with a different symbology than footpaths or other linear features like fences or pipelines. The first step is always to burn the legend into your memory. However, symbology alone isn’t enough. You must also practice ‘terrain logic.’ Look at the trail’s behavior. Does it feature a series of extremely tight switchbacks that a vehicle with a 10-foot wheelbase could never negotiate? That’s a strong indicator of a footpath. Does the trail lead directly to a scenic viewpoint or a mountain peak with no onward connection? This is almost certainly a recreational hiking trail, not a through-route for vehicles.
The “funnel effect” is another classic trap. A route may start as a wide, clear road on the map but gradually narrow. A novice navigator sees the starting point and assumes it remains consistent. An expert traces the *entire* route, watching for signs of it narrowing or its symbol changing, before committing. The best practice is to combine map data with modern tools. If you have any doubt, overlaying a satellite imagery layer can provide instant visual confirmation. The wear patterns of a vehicle track are visibly different from a single-track footpath from above.
Action Plan: Distinguishing Vehicle Tracks from Footpaths
- Study the map legend to differentiate between single dash (hiking trail), dot-dash (4×4 track), and double dash (fence line) symbols.
- Check for tight switchbacks; if turns are too sharp for a vehicle’s wheelbase, it’s likely a footpath.
- Identify paths leading to a single viewpoint with no onward route, which typically indicates a hiking trail.
- Look for trail width indicators; narrow single-line paths are footpaths, while double-line paths suggest vehicle-width routes.
- Cross-reference the trail with satellite imagery to verify if the path shows vehicle wear patterns.
When to Switch From Paper Maps to GPS: The 3 Terrain Types Where Digital Navigation Wins
While a paper map is the foundation of any good navigation plan, there are specific scenarios where a GPS or digital mapping app is not just a convenience, but a critical safety tool. An expert navigator knows when the paper map’s strategic view must give way to the tactical precision of a GPS. These situations are typically defined by a loss of visual information or an increase in navigational complexity.
Complex and Unmarked Trail Networks
In areas with a dense, spider-web-like network of trails, especially if they are poorly marked on the ground, a paper map can become confusing. It’s difficult to be 100% certain which of three converging tracks is the one you want. This is where a GPS with pre-downloaded offline maps shines. The “You Are Here” dot provides instant, unambiguous confirmation at every single fork, eliminating guesswork and preventing the time-consuming process of backtracking from a wrong turn.
Low-Visibility Conditions
When the terrain is obscured by fog, a blizzard, or the darkness of night, your most valuable navigation tool—your eyesight—is compromised. Landmarks shown on the paper map become invisible, making traditional orientation techniques like triangulation impossible. In these conditions, GPS is paramount. It functions independently of visibility, communicating with satellites to provide your exact location. Navigating from one pre-set waypoint to the next becomes a reliable method for moving safely through an otherwise disorienting environment.
Land Access Verification and Emergencies
Navigating through mixed-use land with private property interspersed requires real-time accuracy. Many digital mapping apps feature land ownership layers, allowing you to ensure you are on a legal route and not trespassing—a detail paper maps often lack. Furthermore, in a bailout scenario where conditions deteriorate and you need to find the shortest route to a main road, a GPS can calculate it instantly. This task, while possible on paper, is slow and stressful under pressure. The key is preparation: always download map tiles for your intended area *before* you lose cell service, as the GPS chip itself does not rely on cellular data to function.
How to Identify Scenic Detours Using Topographic Elevation Data in 5 Map Tools
Expert map reading isn’t just about avoiding danger; it’s also about discovering opportunity. The same topographic data that warns of a steep, treacherous climb can also point the way to a breathtaking scenic detour. By learning to recognize specific contour patterns, you can identify routes that offer the best possible views, turning a simple drive into a memorable journey.
The goal is to find routes that maximize elevation and exposure. Instead of seeking the easiest path through a valley, you’re looking for ways to stay high and see far. This involves a different kind of ‘terrain translation’—one focused on finding vantage points rather than avoiding obstacles. There are several key topographic features to look for when planning a scenic drive:
- Ridgeline Roads: These are the ultimate scenic routes. On a map, look for a road or track that runs along the spine of a ridge, with contour lines descending away from it on both sides. Driving a ridgeline provides continuous, panoramic views into the valleys below.
- Topographic Prominence: Identify isolated peaks that stand significantly higher than the surrounding terrain. These are marked by closed, circular or oval contour lines. A road that leads to or circles the summit of such a peak is a prime candidate for spectacular 360-degree vistas.
- Bench or Shelf Roads: In steep terrain, look for roads that run parallel to the contour lines for an extended distance. These “bench” cuts are carved into the side of a mountain and offer dramatic, sustained views looking down into a valley or canyon.
- Significant Elevation Transitions: A route that climbs rapidly in elevation offers a changing landscape. Target routes that cross multiple, widely-spaced contour index lines, indicating a gain of a thousand feet or more. This often means transitioning between ecosystems, such as from a desert floor to a forested alpine environment.
- Valley Shapes: The shape of the valleys your route passes through affects the view. Broad, U-shaped valleys, carved by glaciers, typically offer wide, open vistas. Tightly-carved, V-shaped valleys indicate river erosion and provide a different, more enclosed and dramatic canyon-like experience.
Key Takeaways
- Predictive Navigation: The primary goal of map reading is not just to find your way, but to anticipate physical challenges to the vehicle like traction loss and clearance issues.
- Hybrid Tooling: The most resilient navigation strategy combines the ‘big picture’ reliability of paper maps with the real-time, tactical precision of GPS.
- Terrain > Symbol: A symbol on a map is a starting point; the surrounding terrain context (contour shapes, elevation) reveals the true nature of the feature.
Why Steep Gradients Above 20% Demand Specific Driving Techniques to Avoid Rollback
Not all gradients are created equal. While any slope requires careful driving, a gradient of 20% (a 1-in-5 slope, or about 11.3 degrees) is a critical threshold where vehicle physics change significantly and standard driving techniques become insufficient, even dangerous. At this level of steepness, gravity begins to overpower the vehicle’s idle stability, and the risk of uncontrolled rollback during a stall or a gear change increases exponentially. This is why professional grading guidelines suggest that building on slopes exceeding 25% should be avoided; it’s simply an unstable environment.
When ascending a slope this steep, two things happen. First, weight is transferred to the rear axle, which can lighten the front wheels and reduce steering effectiveness. Second, any interruption in power—like a clumsy gear shift or a momentary loss of traction—can result in an immediate and rapid backward slide. Attempting to shift gears mid-climb is a cardinal sin, as the brief moment of being in neutral is enough to initiate a dangerous rollback.
Therefore, any section of trail identified on your map as exceeding this 20% threshold must be approached with a specific protocol:
- Pre-Climb Gear Selection: Engage low-range and select 1st gear *before* you start the ascent. You must commit to this gear for the entire climb.
- Steady Momentum: Maintain a smooth, constant throttle. Avoid jerky movements that can break traction.
- Stall Recovery: If the engine stalls, immediately and firmly apply the parking and foot brakes. Restart the engine in neutral, select 1st low, and then smoothly release the brakes while applying steady power.
- Failed Ascent Protocol: If you cannot make the climb, do not attempt a three-point turn. This is how most rollovers happen. The correct procedure is to reverse straight back down the hill in low-range 1st gear, using engine braking to control your speed.
– Left-Foot Braking (Advanced): Experienced drivers can use their left foot to lightly apply the brake while the right foot is on the accelerator. This pre-loads the drivetrain, eliminating any slack and preventing rollback if you need to pause and restart.
How to Navigate Rugged Topography by Road Without Damaging Your Vehicle
The ultimate goal of predictive navigation is to complete a journey with your vehicle—and yourself—intact. By translating topographic features into potential mechanical threats, you can choose a route and driving line that minimizes stress on your suspension, chassis, and drivetrain. This final layer of terrain translation is about protecting your investment.
Your vehicle has three critical geometric limits: its approach angle (how steep a slope it can climb without the front bumper hitting), departure angle (the same for the rear), and breakover angle (the angle it can drive over without the chassis getting beached on the crest). A topo map helps you anticipate all three. Sharp crests, identified by back-to-back, tightly-packed contour lines, signal a high risk of getting high-centered. The entry and exit points of gullies or washouts, marked by ‘V’ shapes in the contours, test your approach and departure angles.
Furthermore, the map can hint at the surface composition. Wide, flat, low-lying areas (widely spaced contours) are often poorly drained and can hide mud or sand traps. Steep, well-drained slopes are more likely to be rocky and stable but present a risk of tire damage. By carefully tracing a route that minimizes sharp crests and maintains a safe gradient, such as the 5% (or 1.5 in 30) grade often used in road design, you can proactively avoid areas likely to cause damage. This is not about finding the shortest route, but the mechanically-safest one.
This approach transforms the map from a simple directional tool into a comprehensive risk management plan. By anticipating the physical forces and geometric conflicts before they happen, you can navigate the most rugged terrain with confidence and control, ensuring the only thing you bring home are memories, not repair bills.
The next logical step is to take a familiar route on a map and start practicing this ‘terrain translation’ to build your predictive navigation skills. By applying these principles, you will transform your approach to off-road travel, making every trip safer and more enjoyable.